
Exchange of front suspension arms
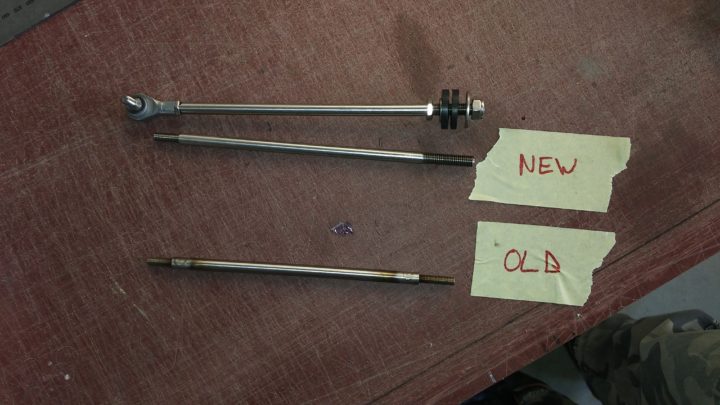
Direction rods and suspension arms of the front wheel suspension are made of hollow 8mm tube with welded M6 threads at each side. This construction combines light weight with rigidity and strength.
Since this type of rods have been implemented 5 years ago, 3 of them broke. It is always the same, short, front arm and it breaks at the same place, where the thread is welded in the tube at the side where it is mounted in the front wheel well. The stress created by repeated movement and torque in combination with a weak spot due to welding can be the explanation for this failure.
As this is a safety matter, we ask all owners of a WAW with production number between WAW152 and WAW323 to exchange these arms with stronger arms. The stronger arms are made of a full 8mm rod with M8 thread ad the front side. No welding is involved in the production of them. Installing them will remove any risk of breaking.
Exchanging the rods is not difficult and takes not more than one hour all included, see explanation under. The rods can be send for free to your dealer or to you directly. Contact your dealer or contact us directly using our contact form with mention of your name, your complete address, your phone number, your WAW production number and from who you bought it.
Instruction for changing the front arm:
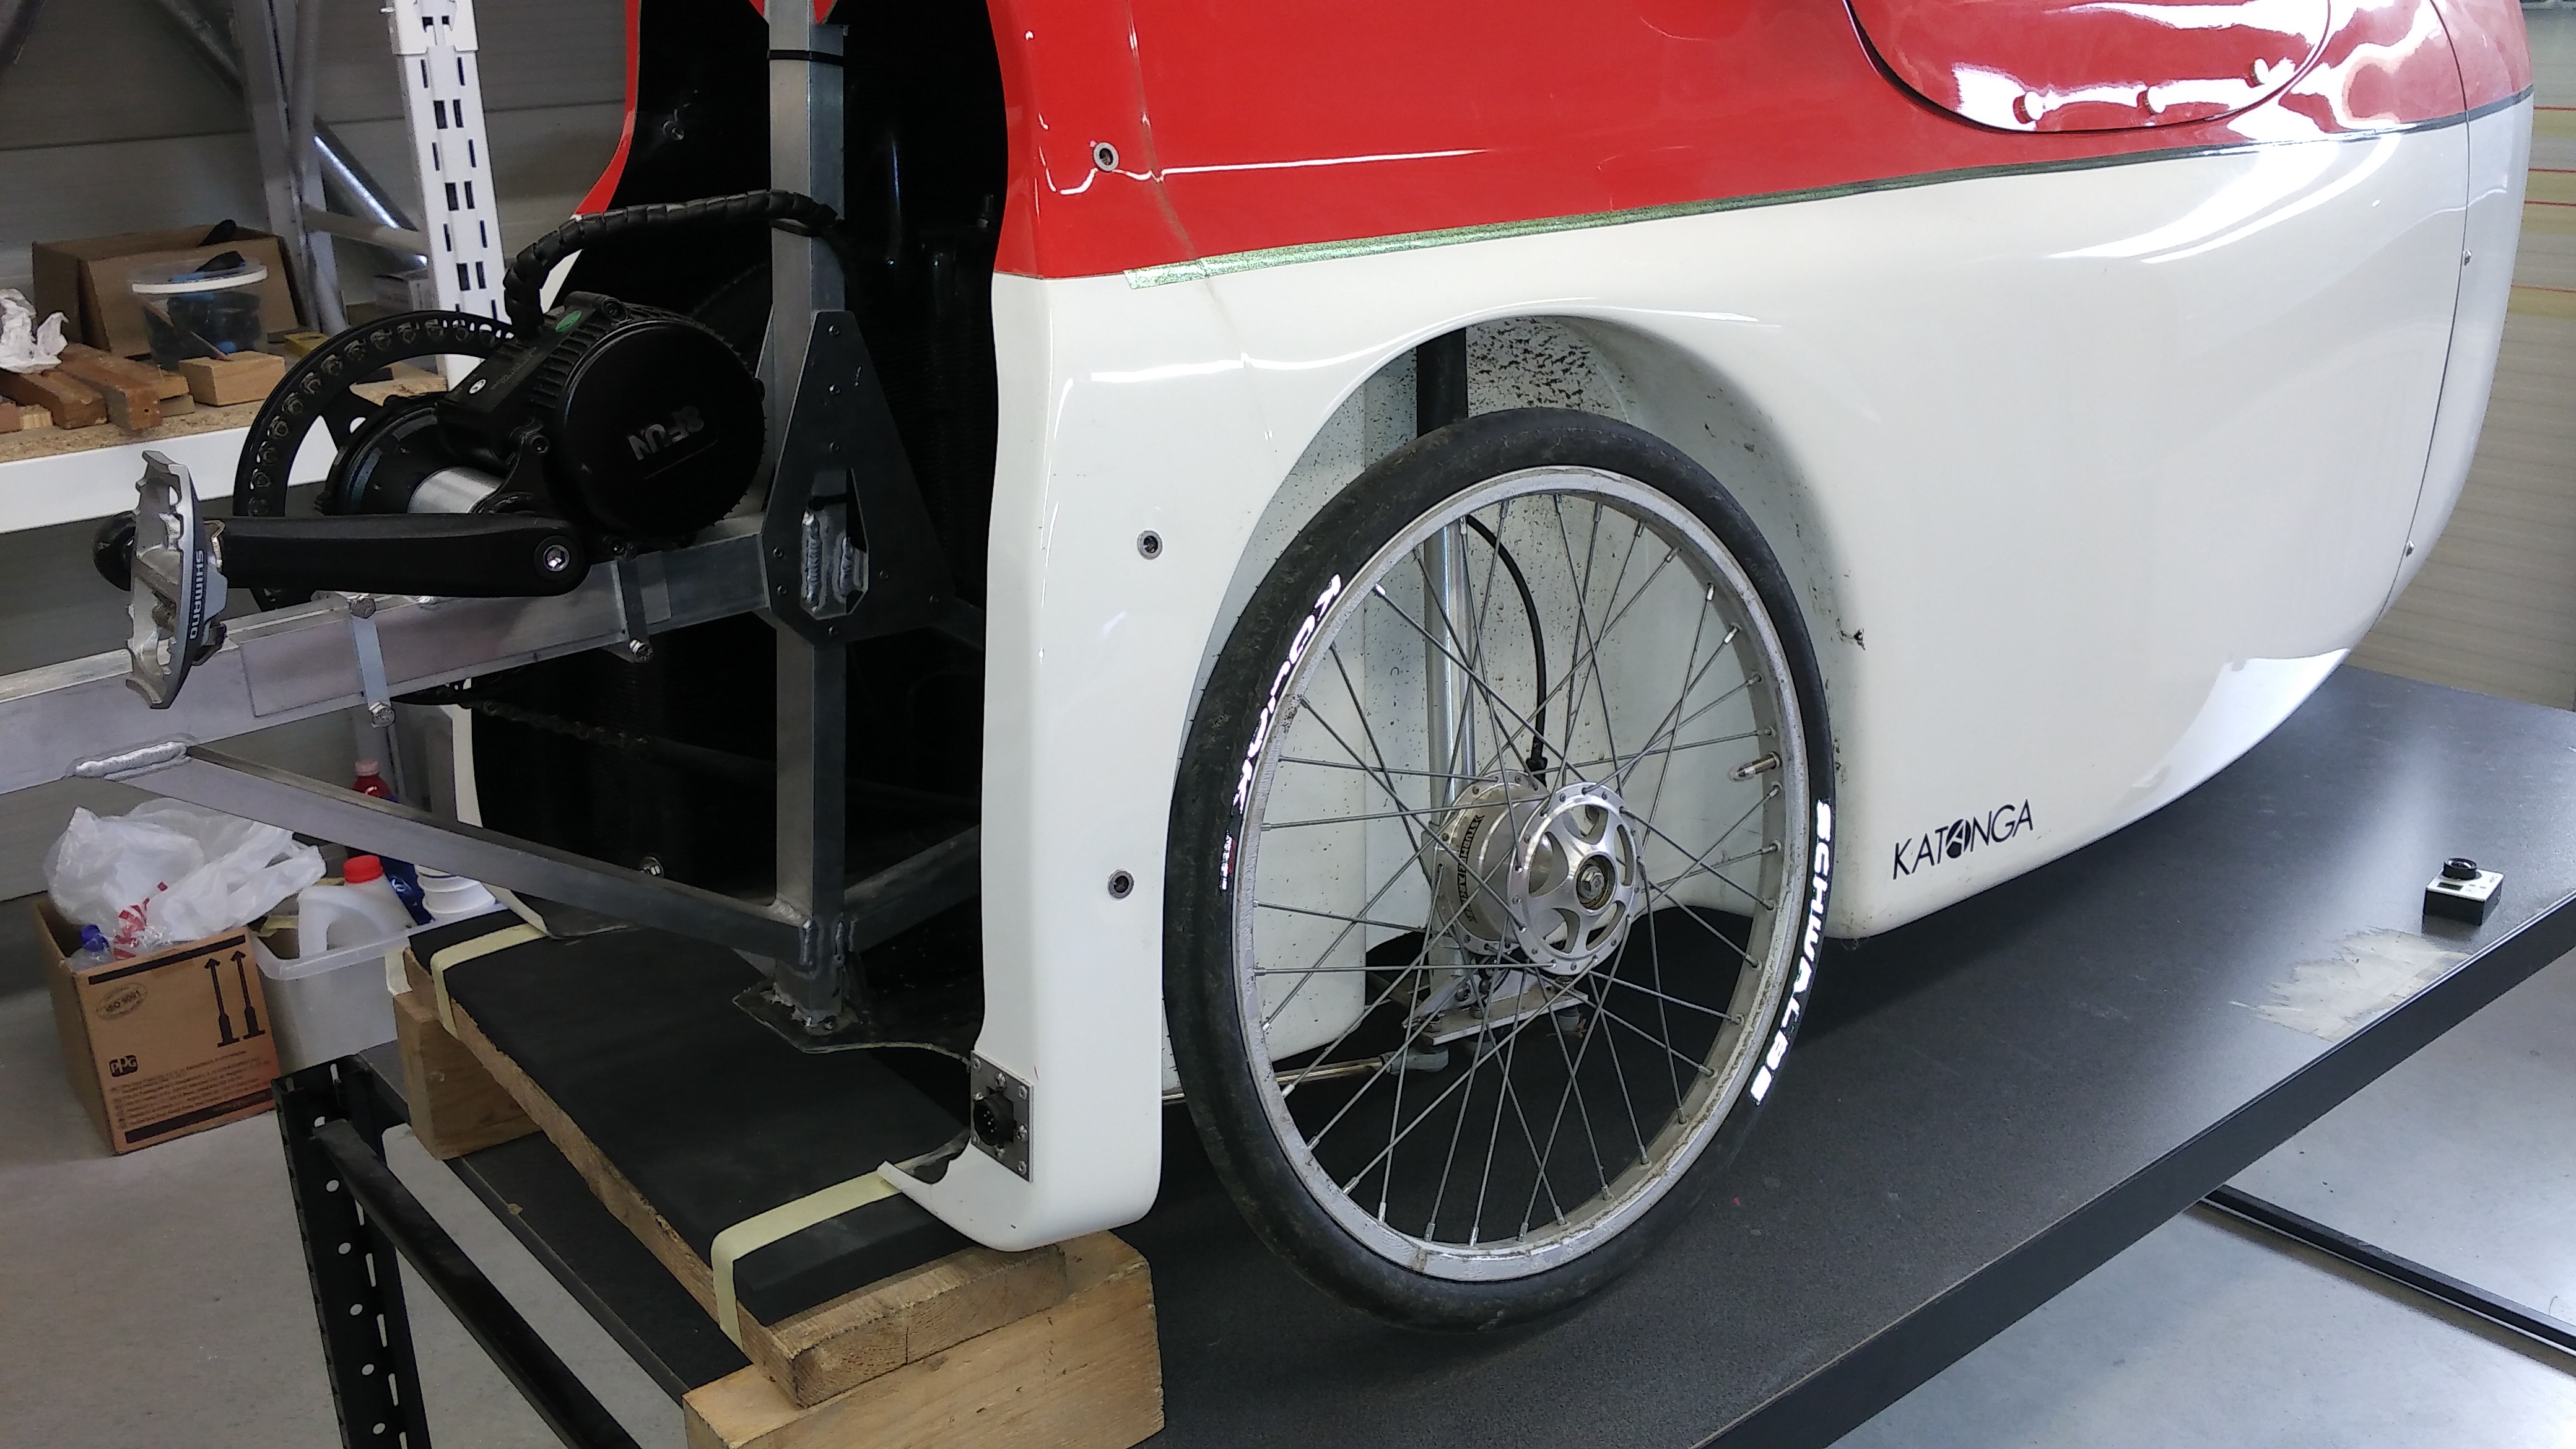
1. Prepare the WAW by removing the nose fairing and lifting one front side from the ground.

2. Remove the front wheel (after first removing the wheel cover). The front arm is now well accessible.
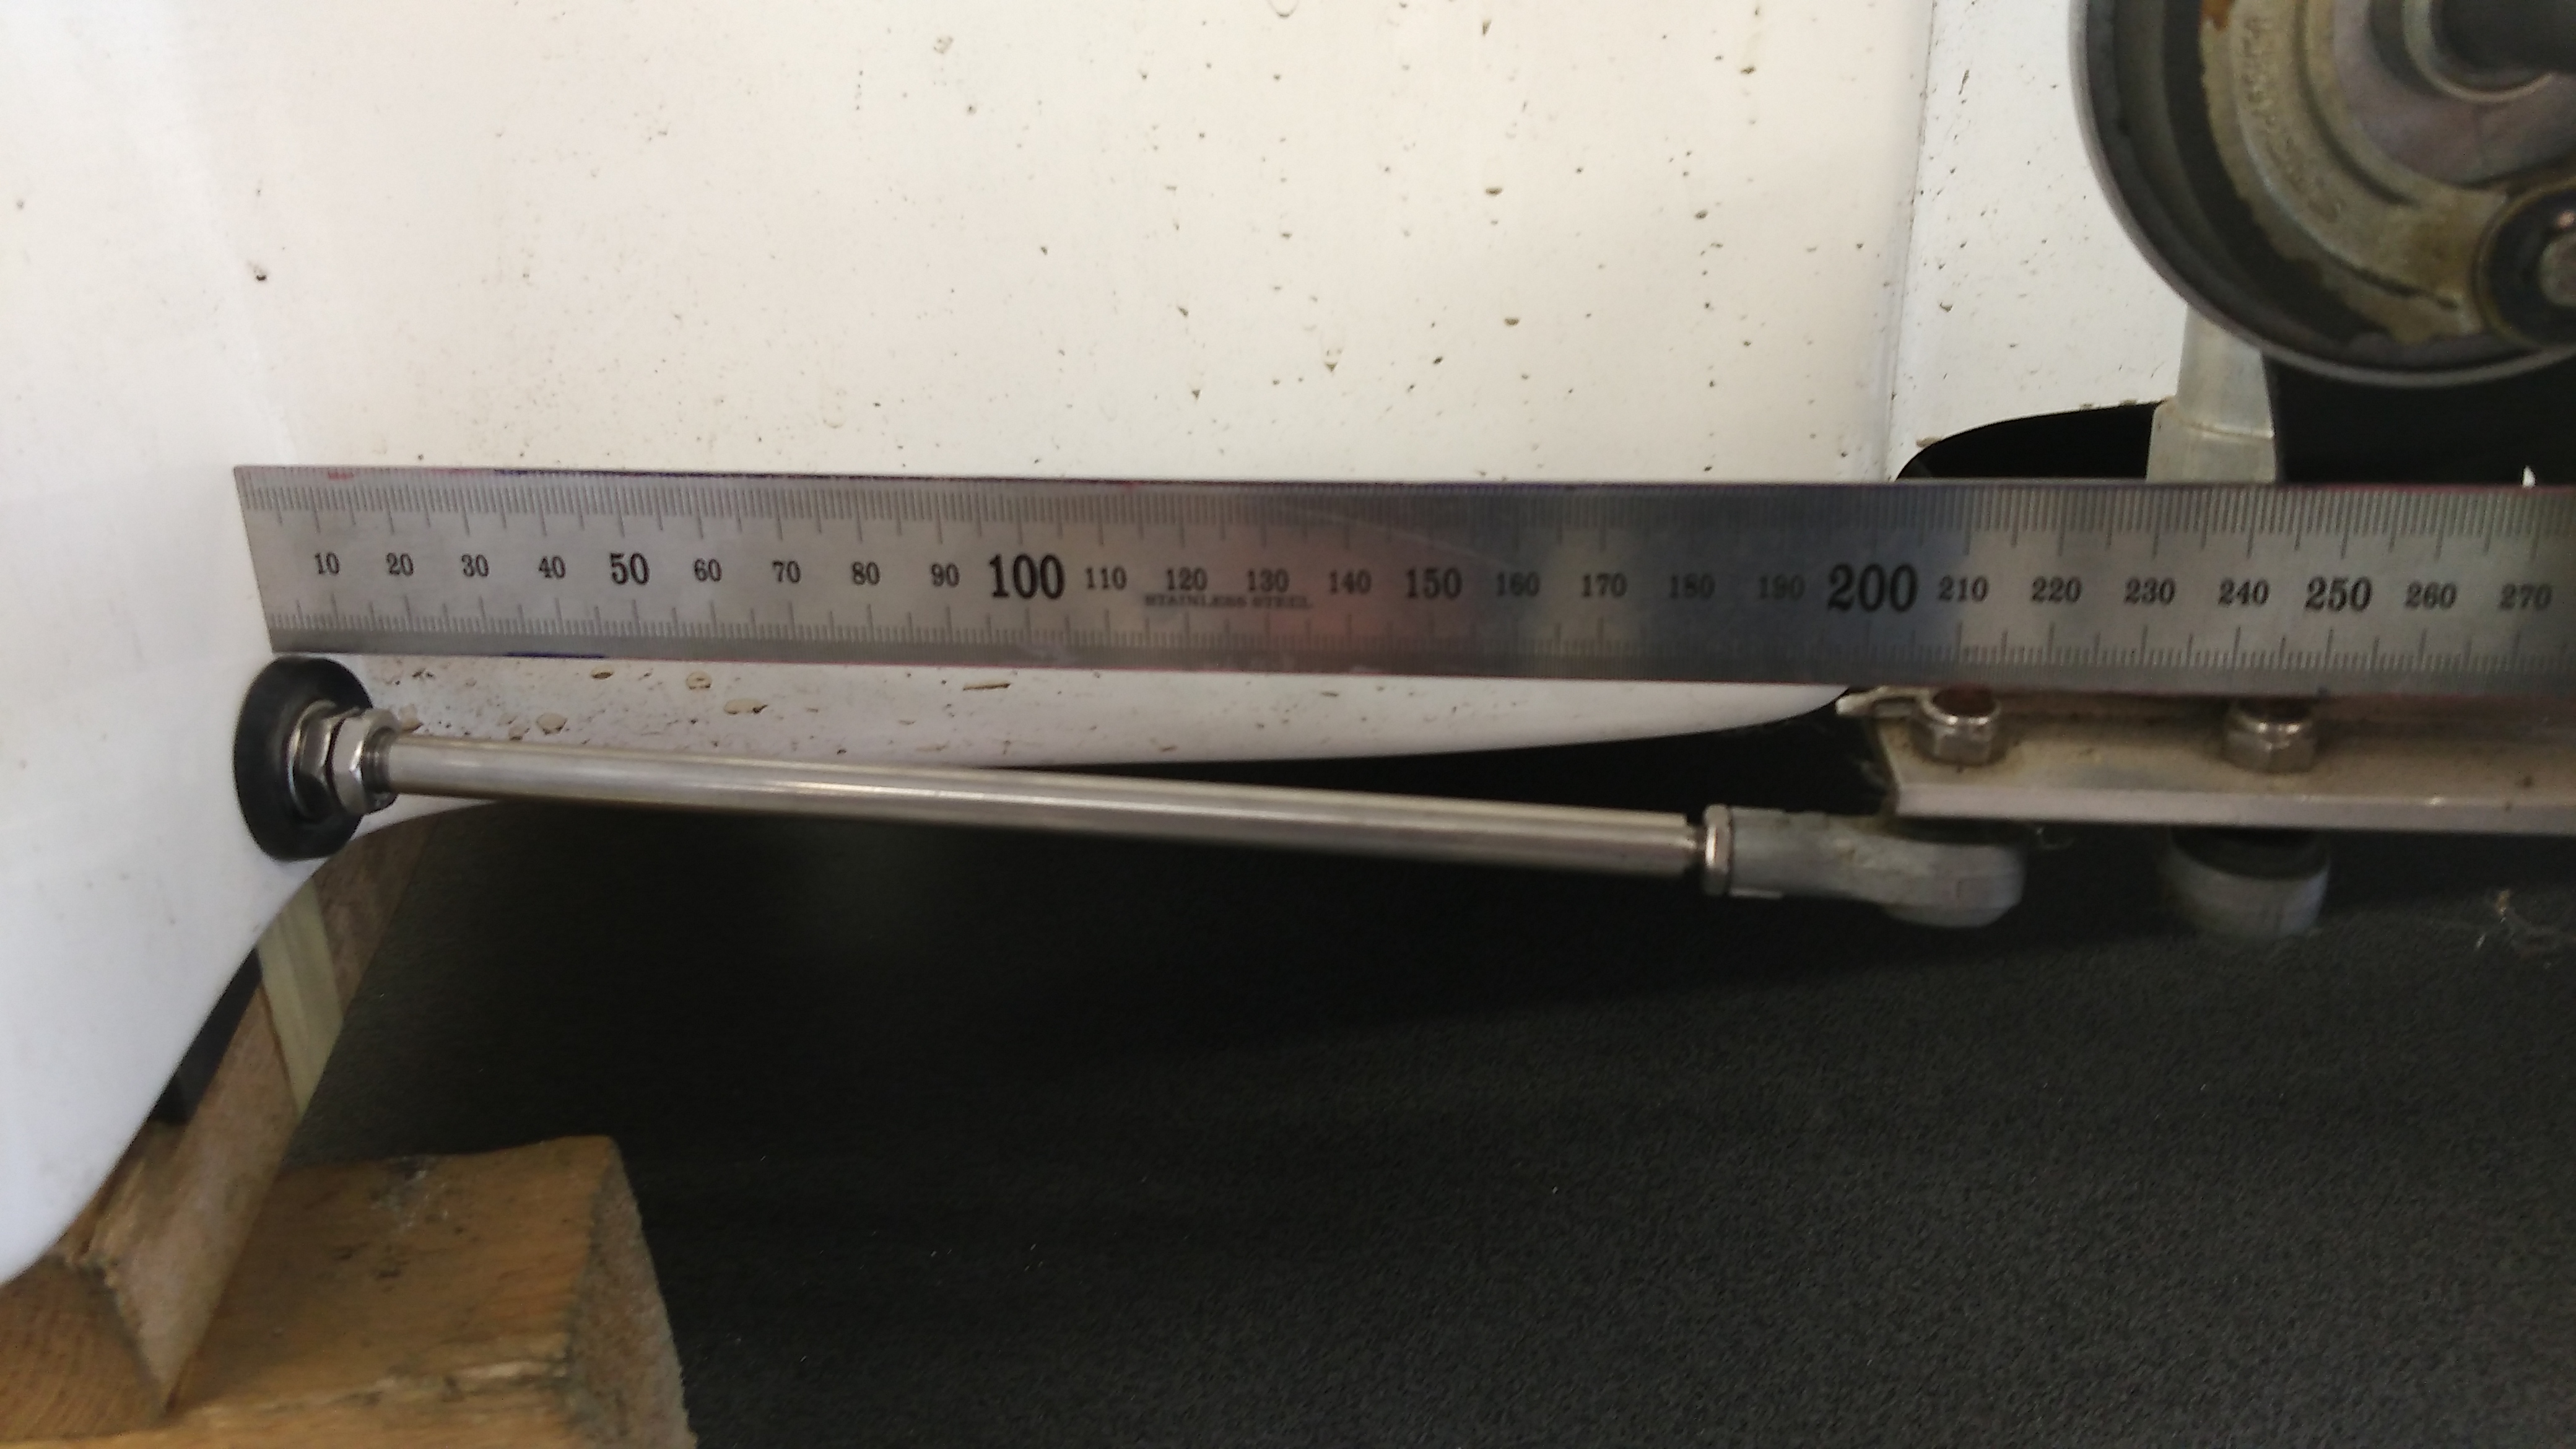
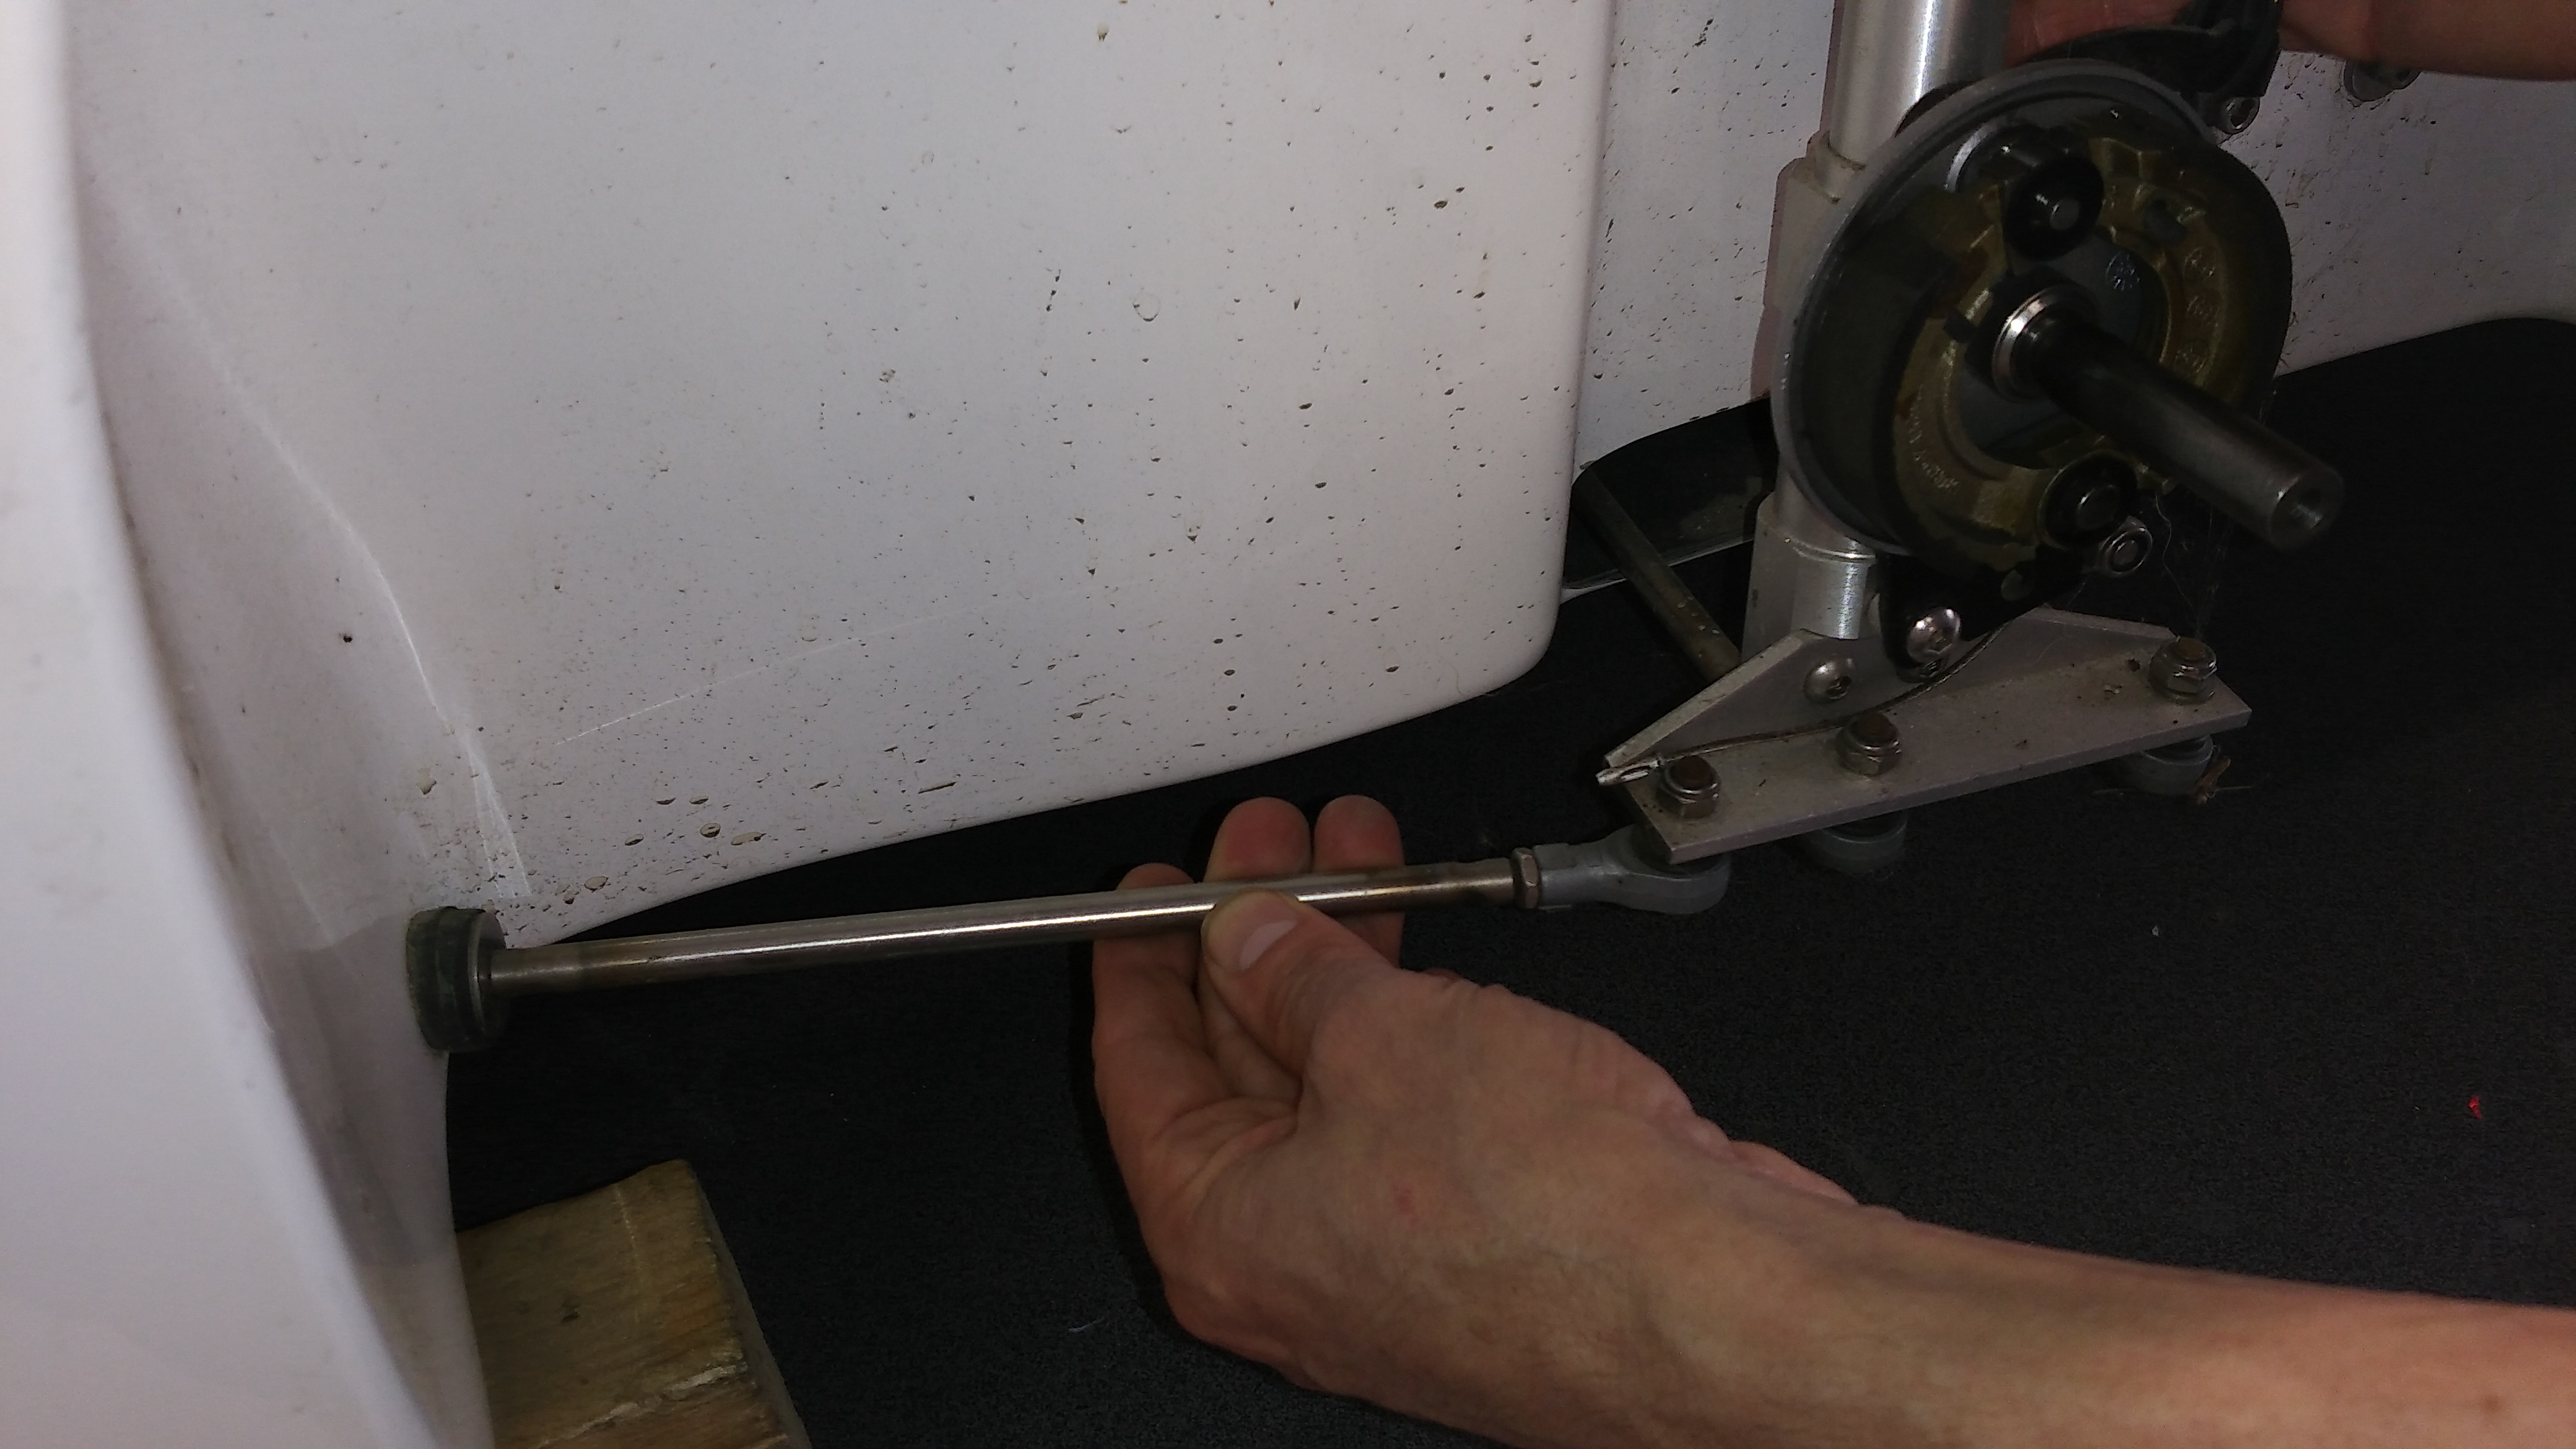
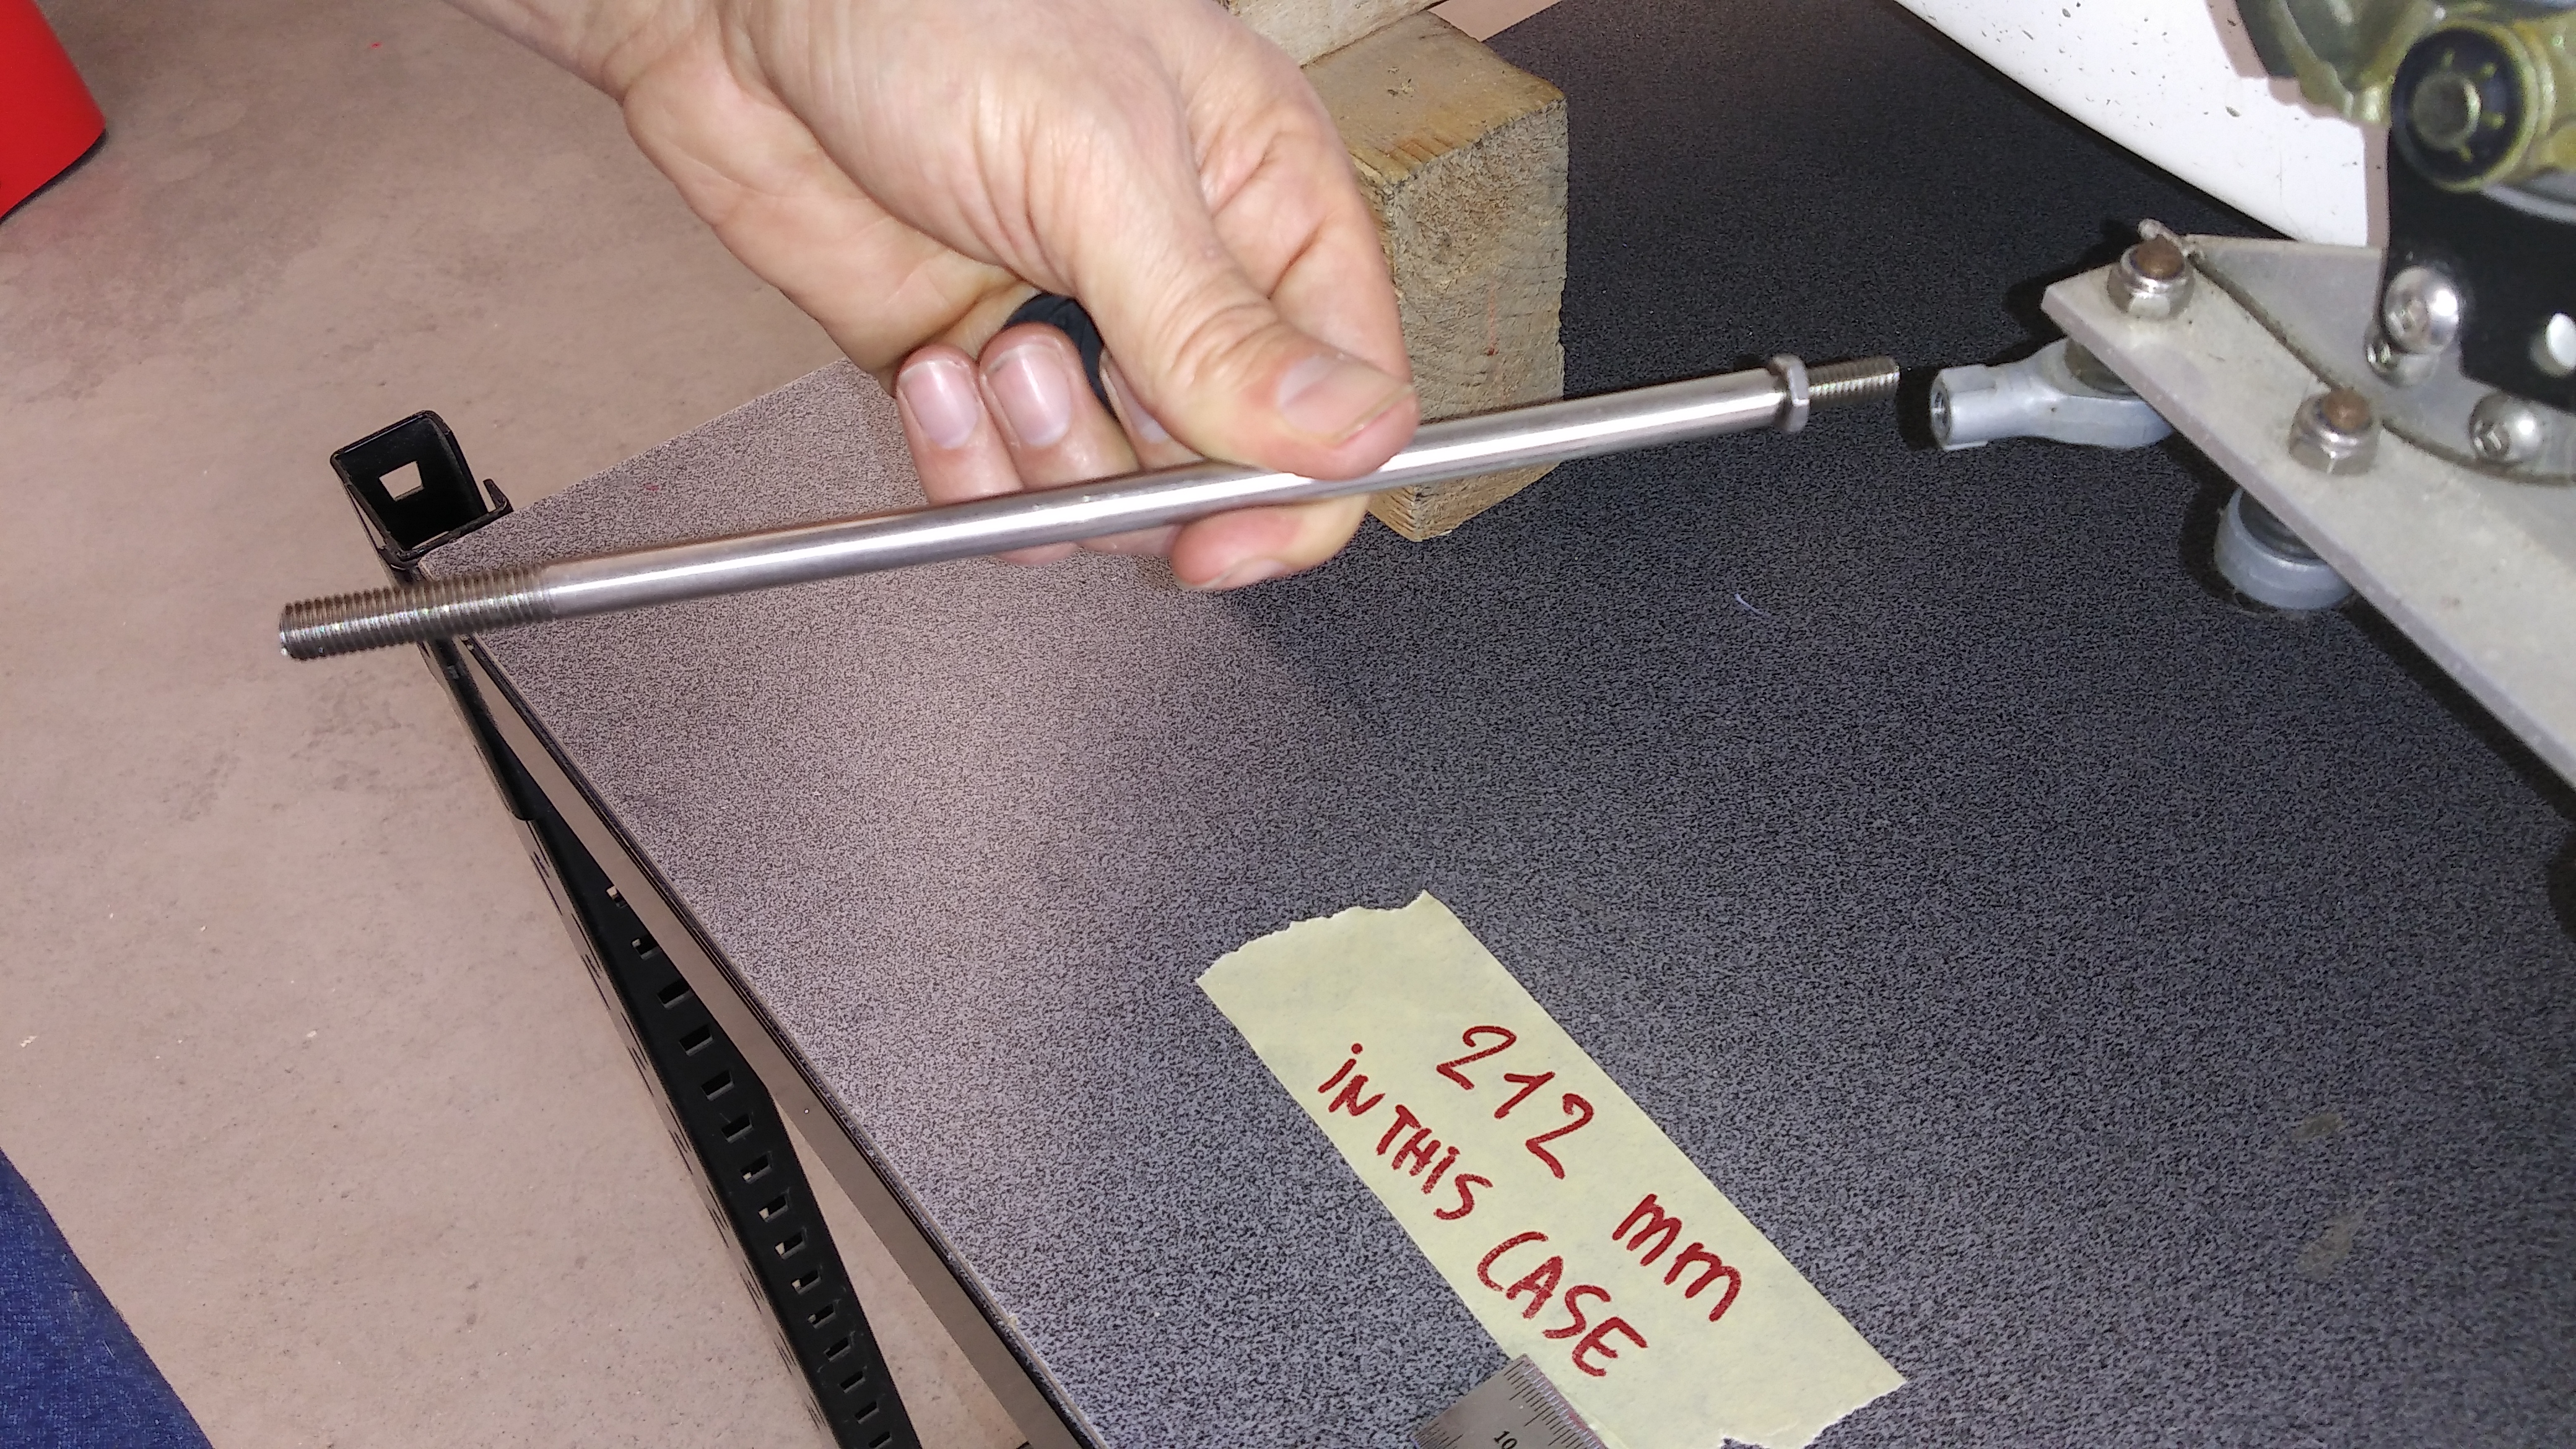
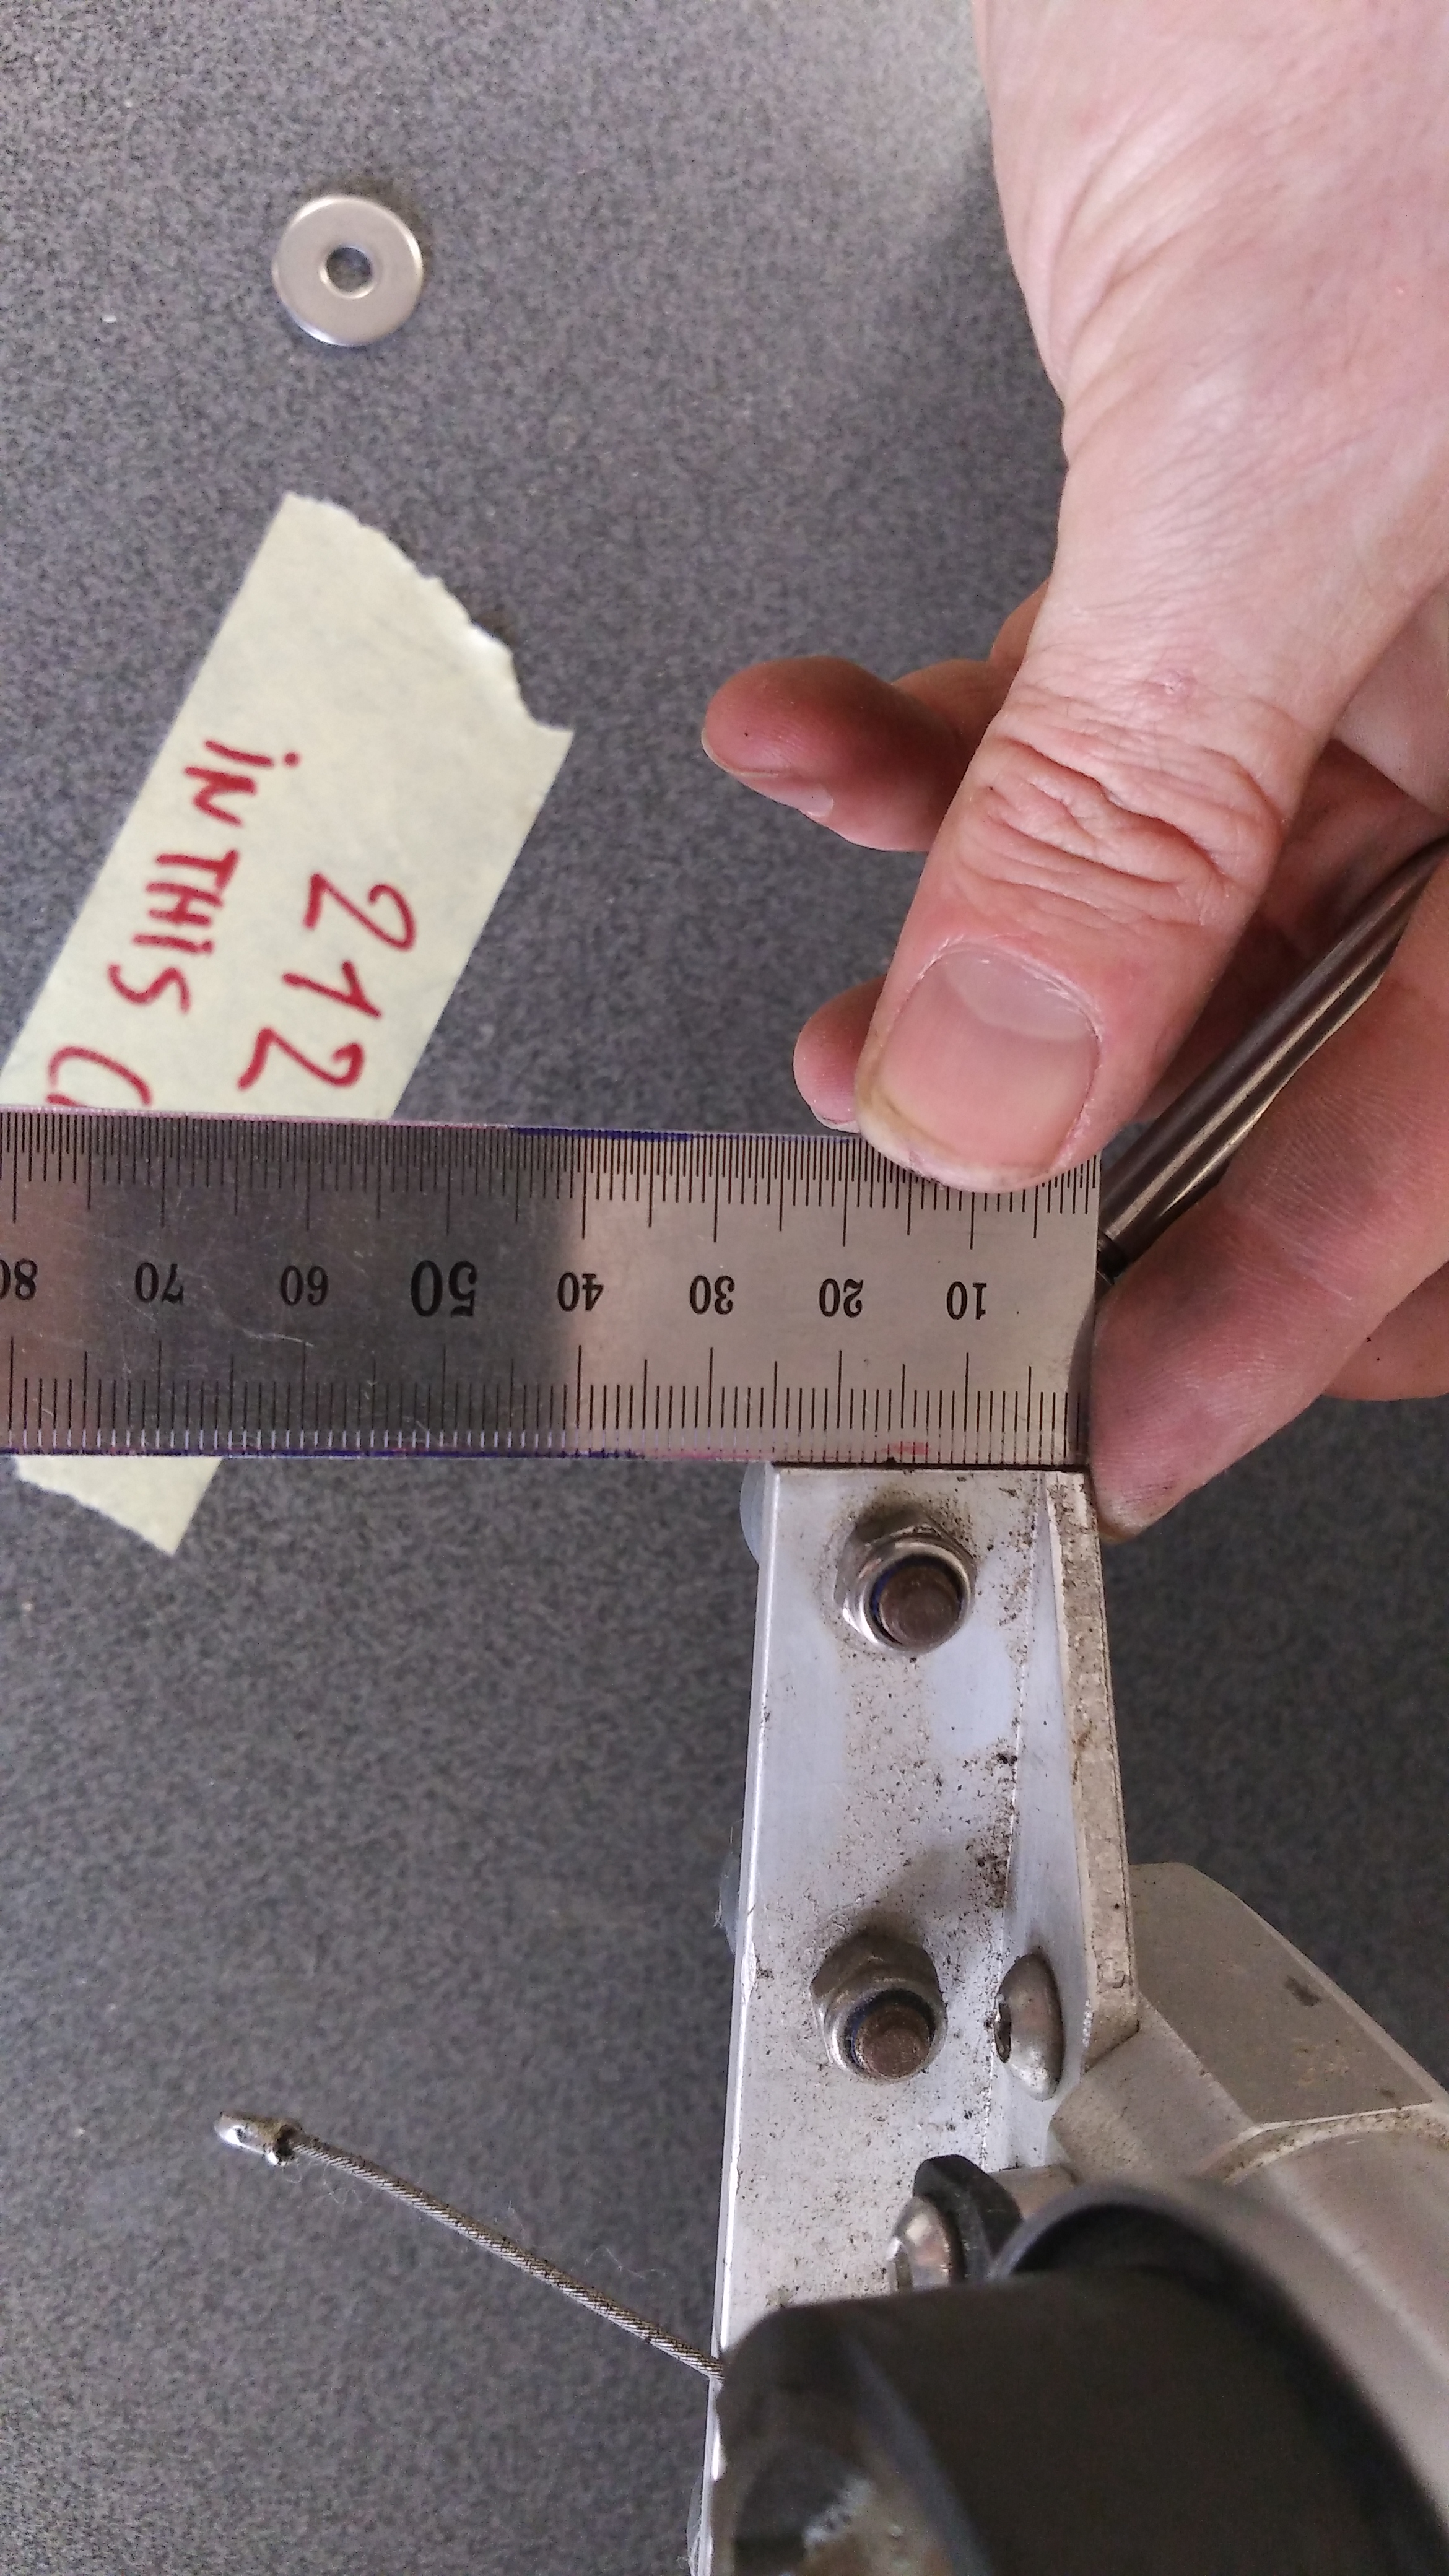
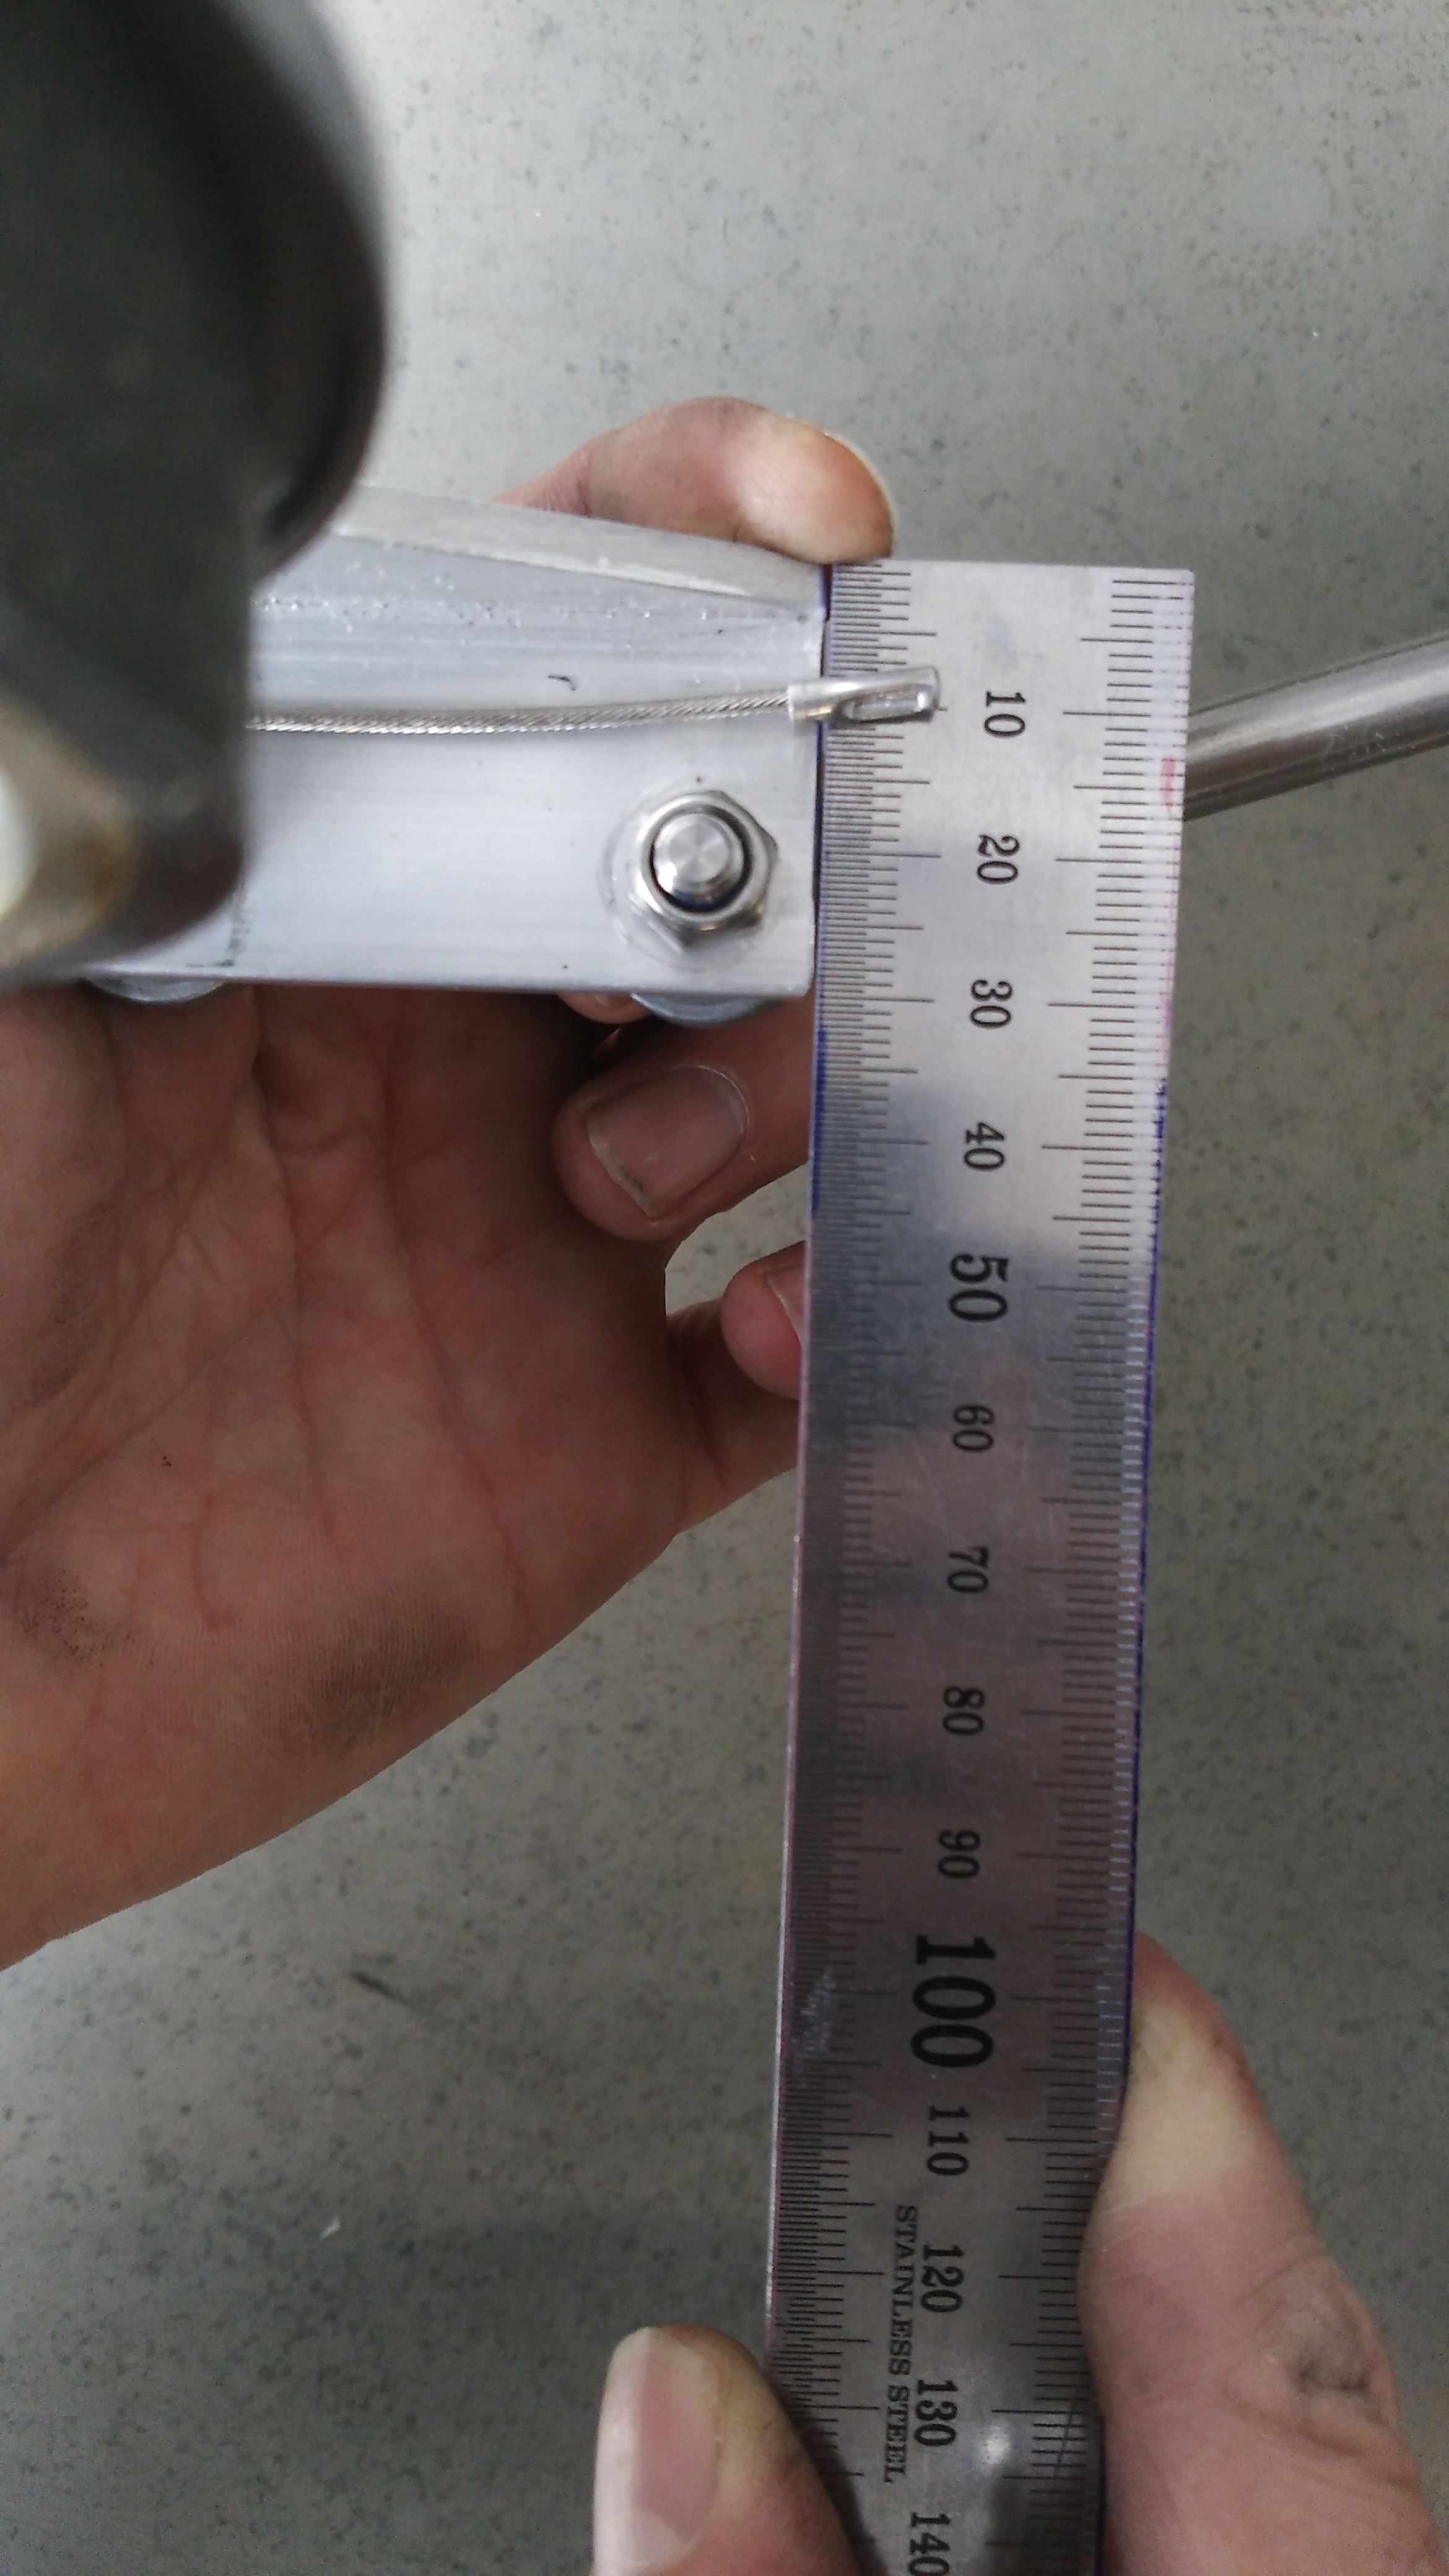
3. Before removing the old arm, measure precisely the distance between the wheel well and the rod end. You will use exactly the same distance for the new rod, so that this exchange will not interfere with the steering geometry.
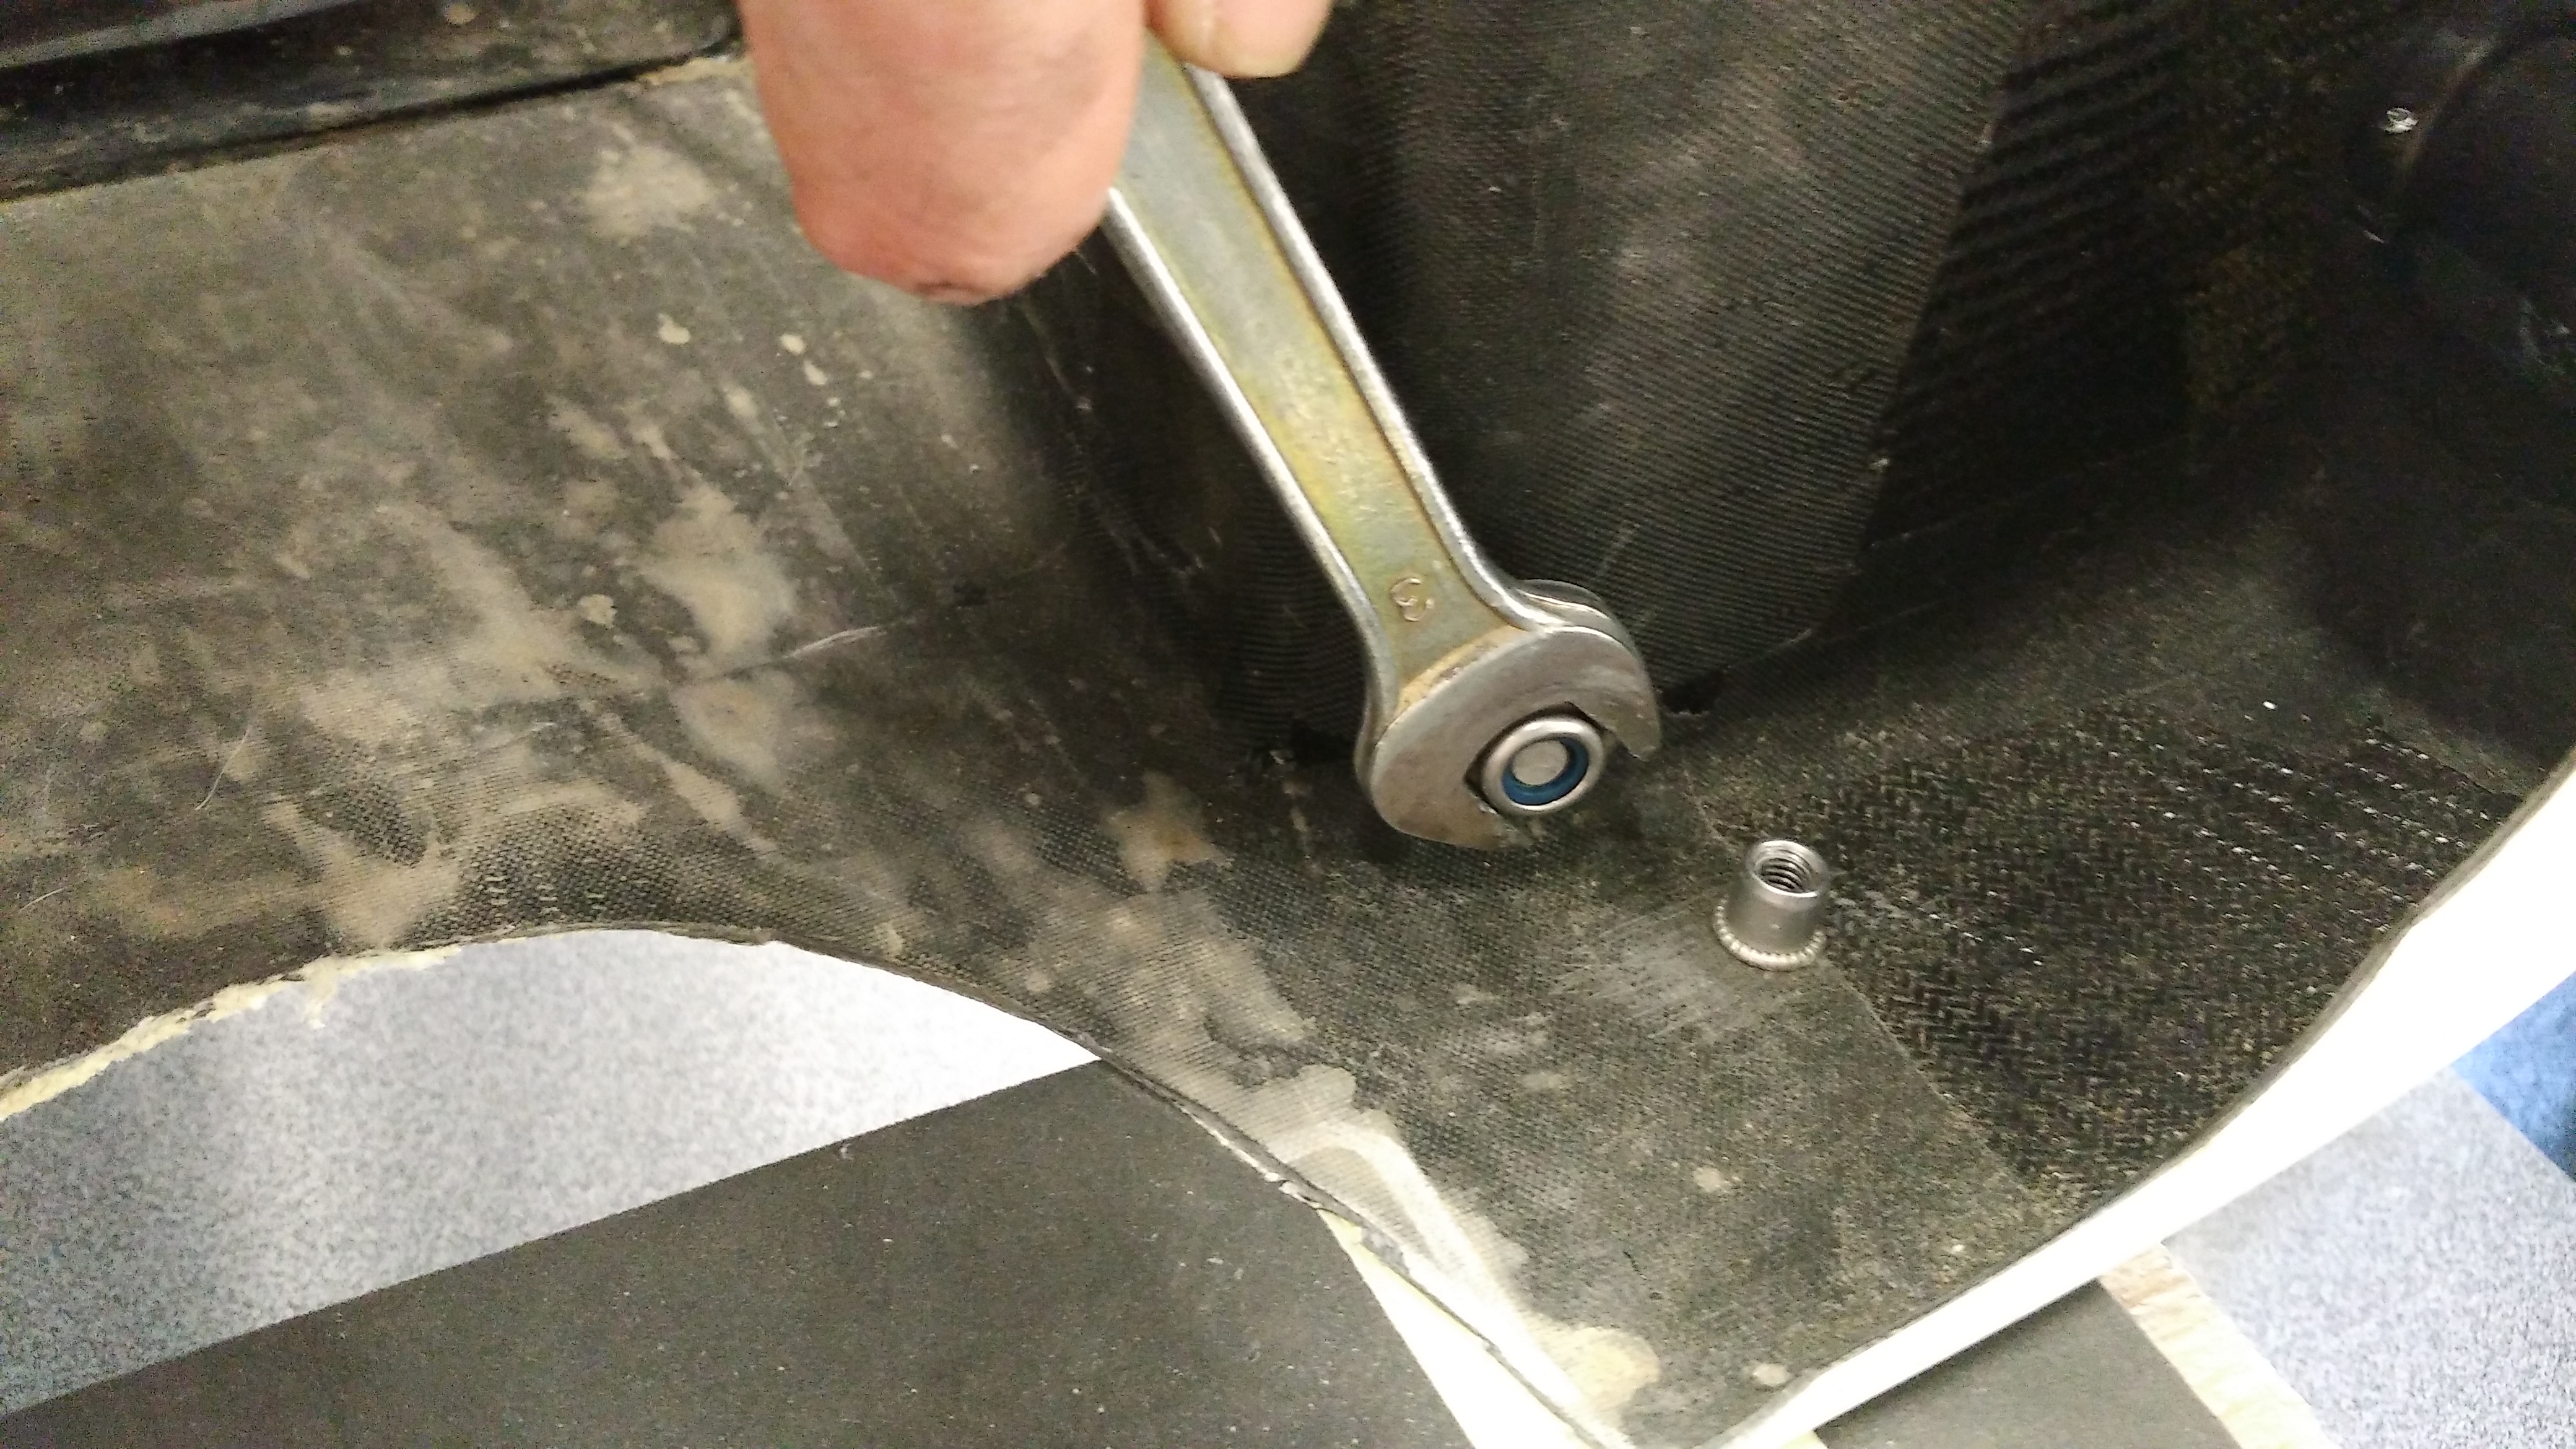
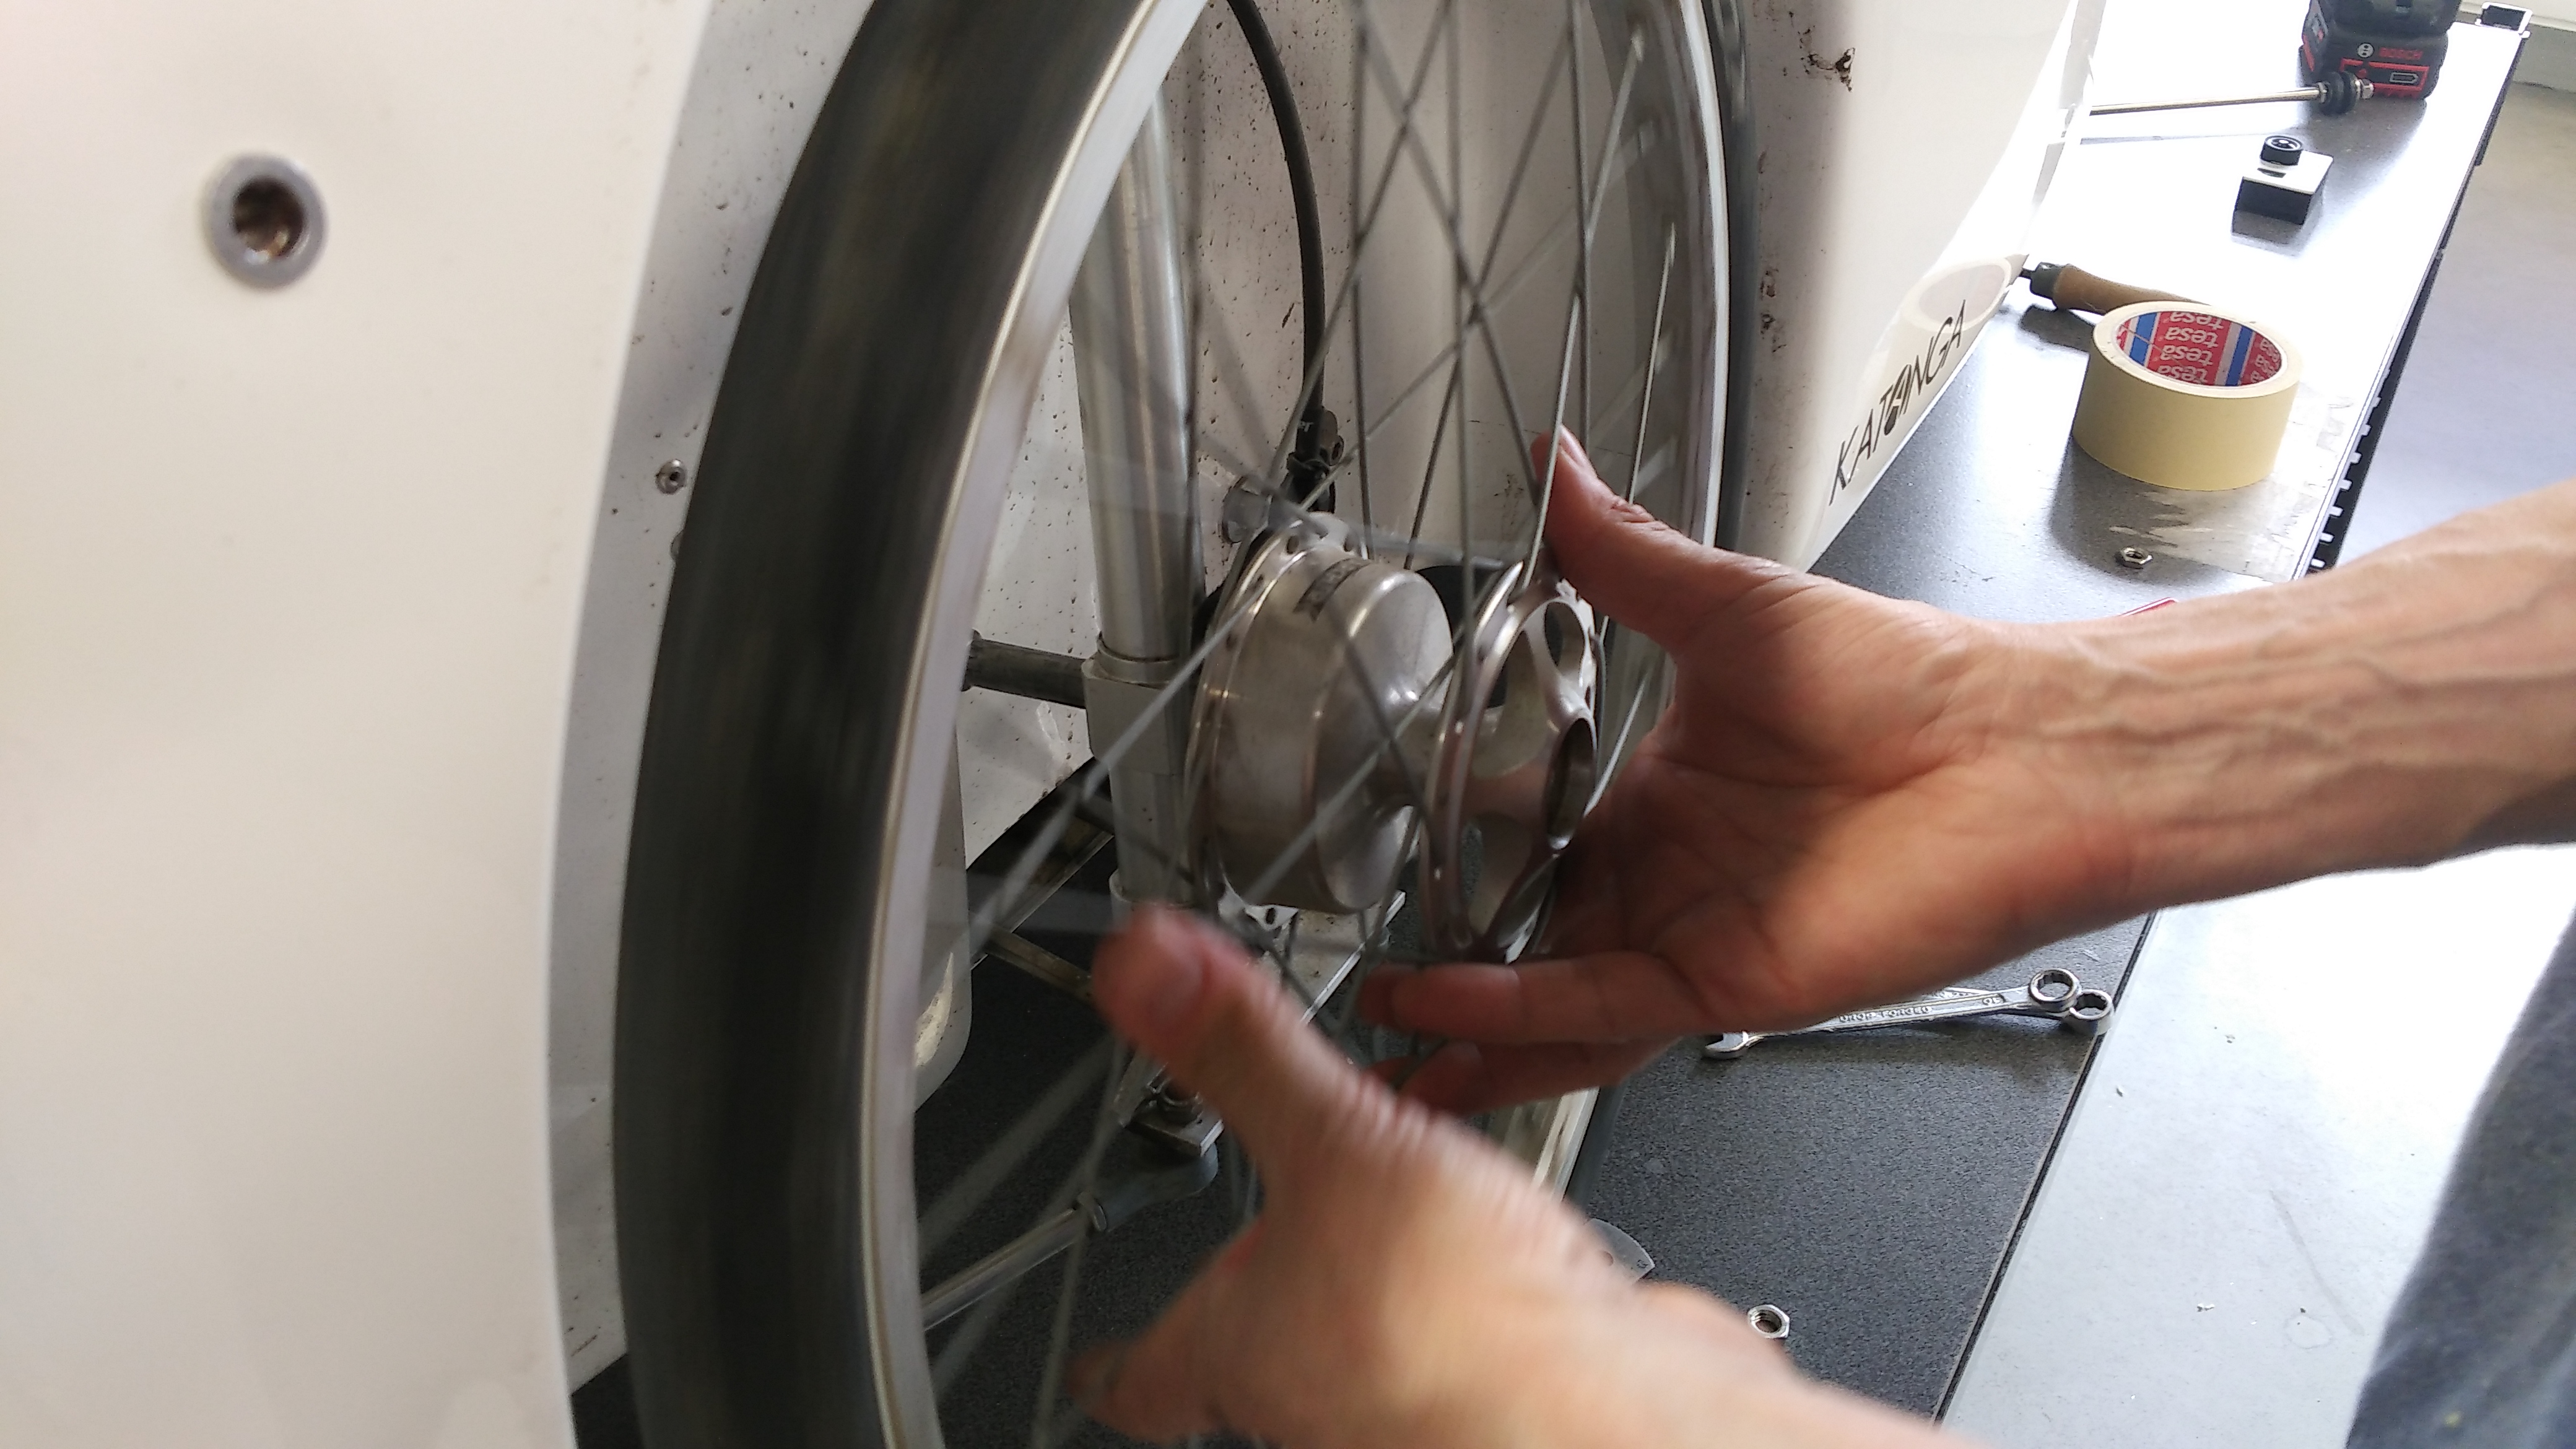
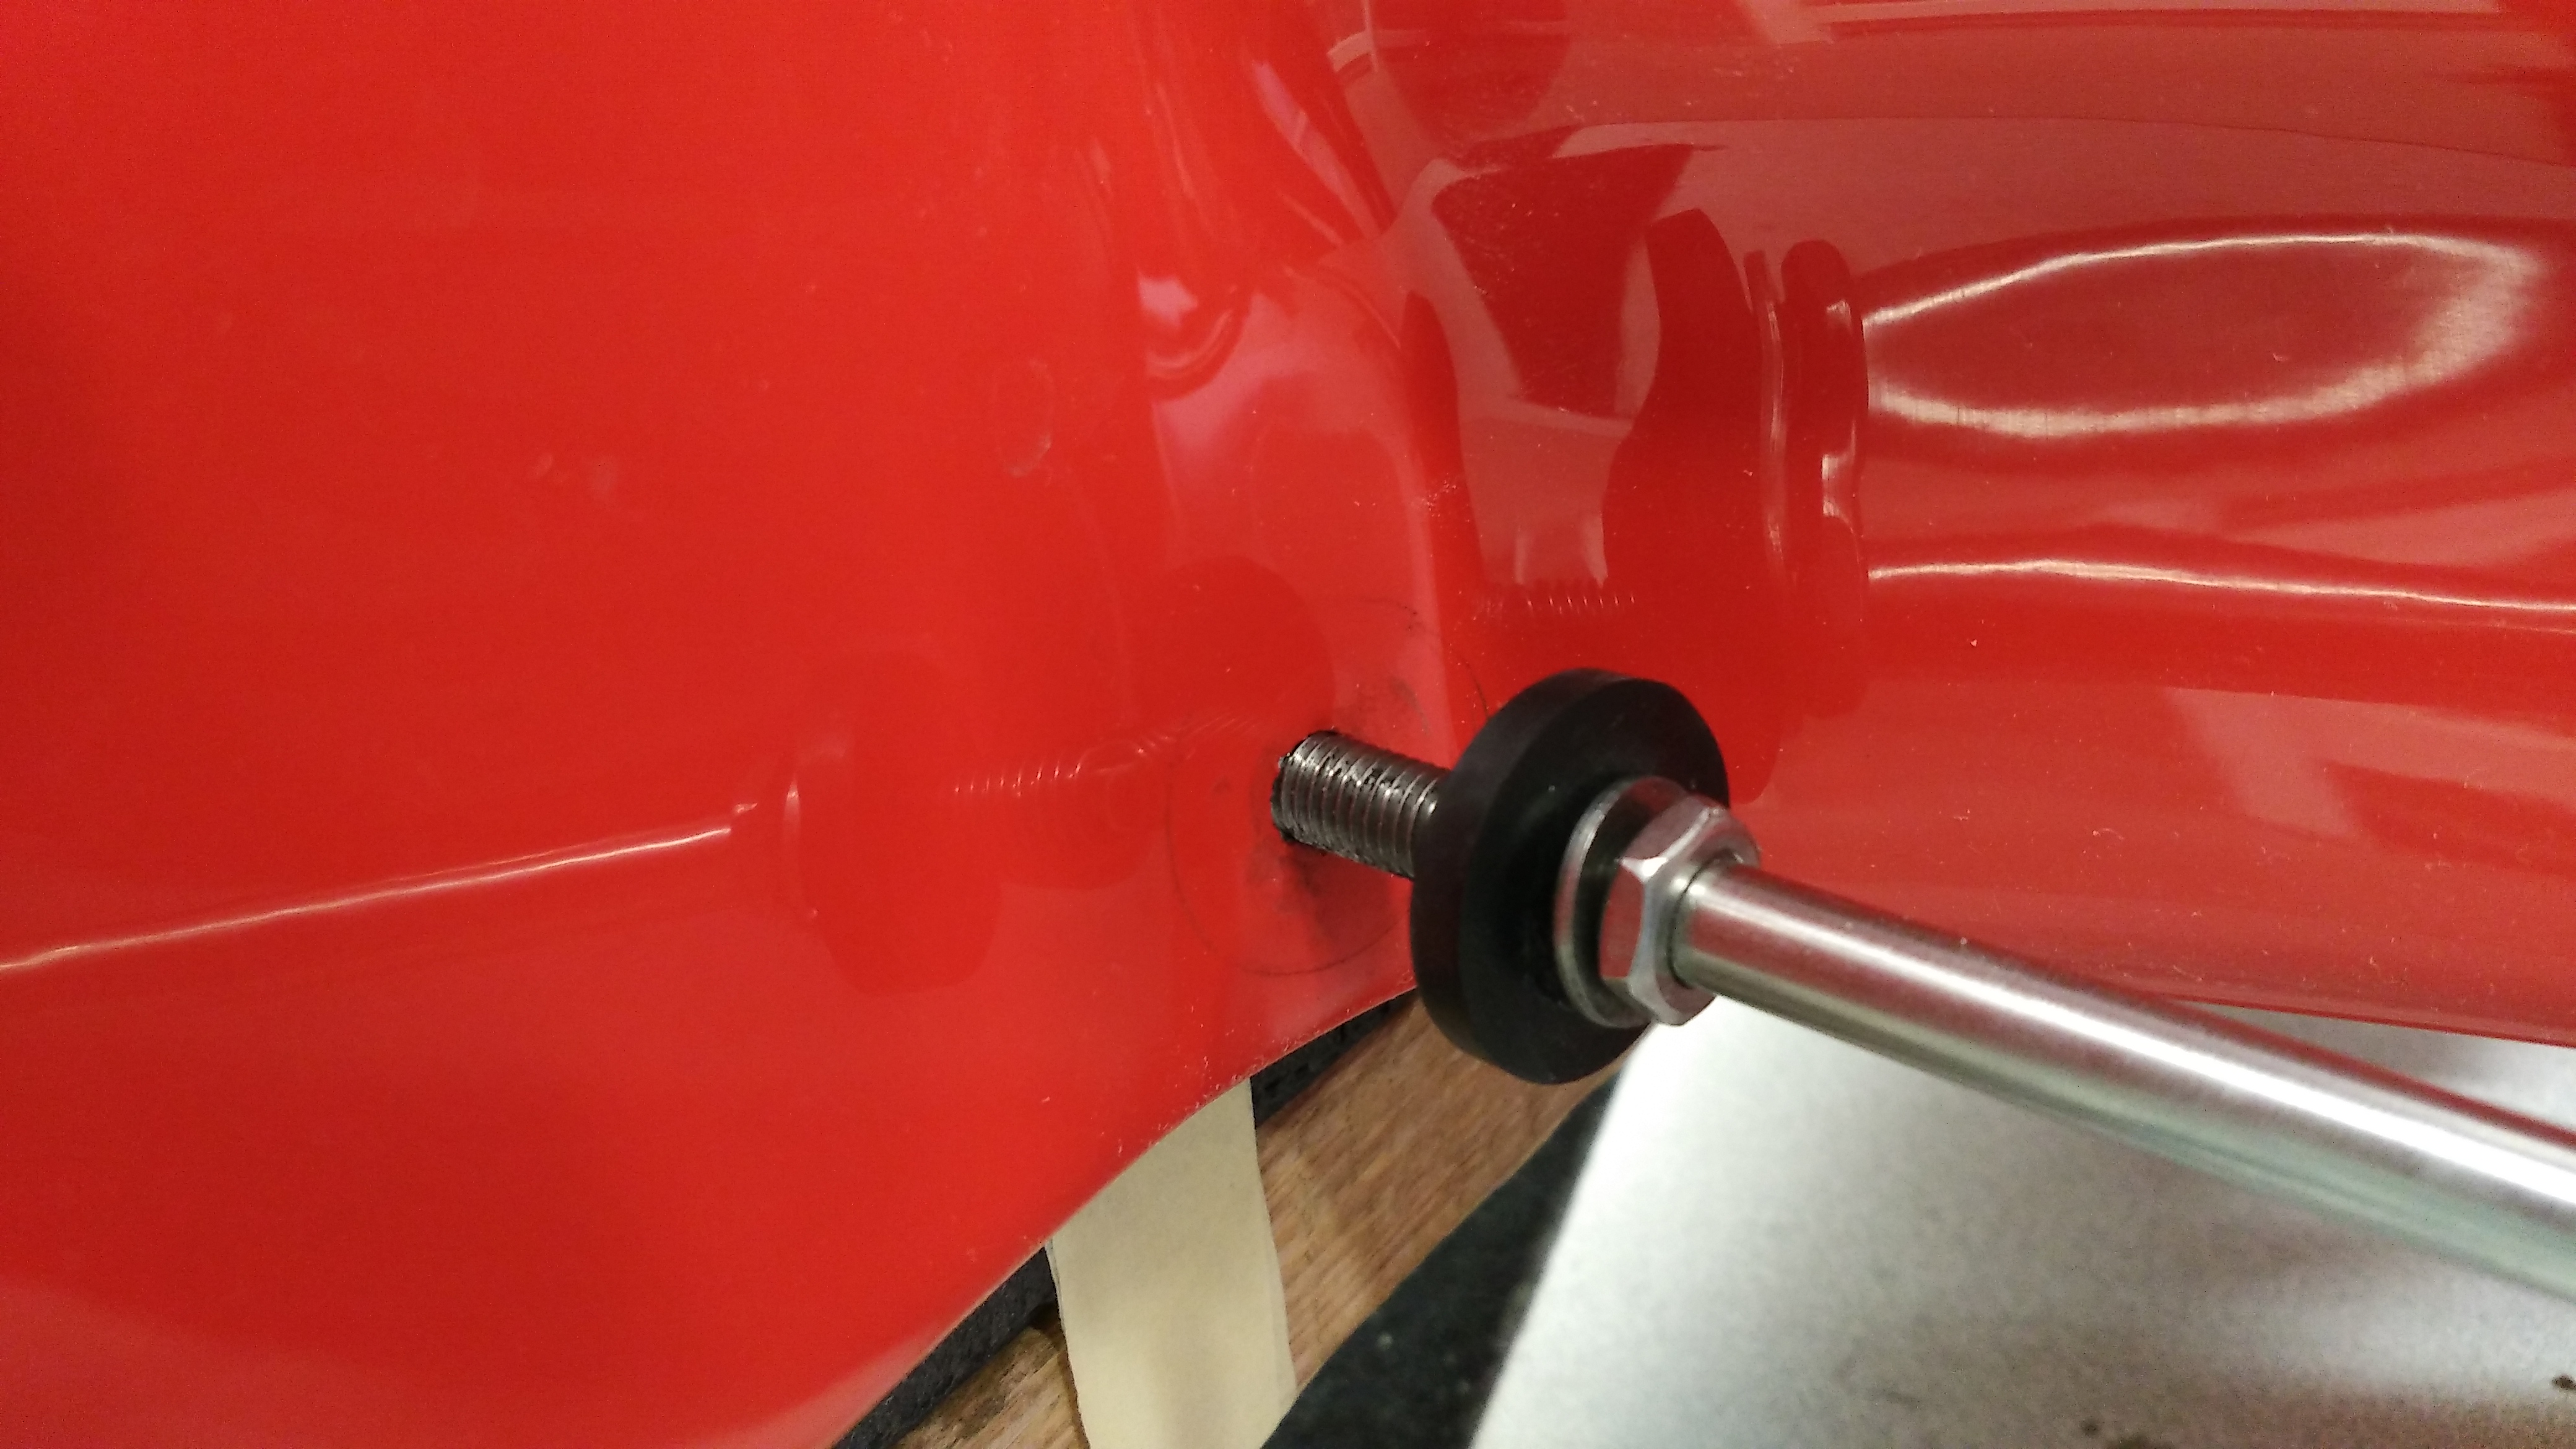
4. Unscrew the M6 nut from the inside of the WAW while preventing the arm from turning by blocking the rod end at the other end. Remove also the steel and rubber washer and pull the arm outside the wheel well.

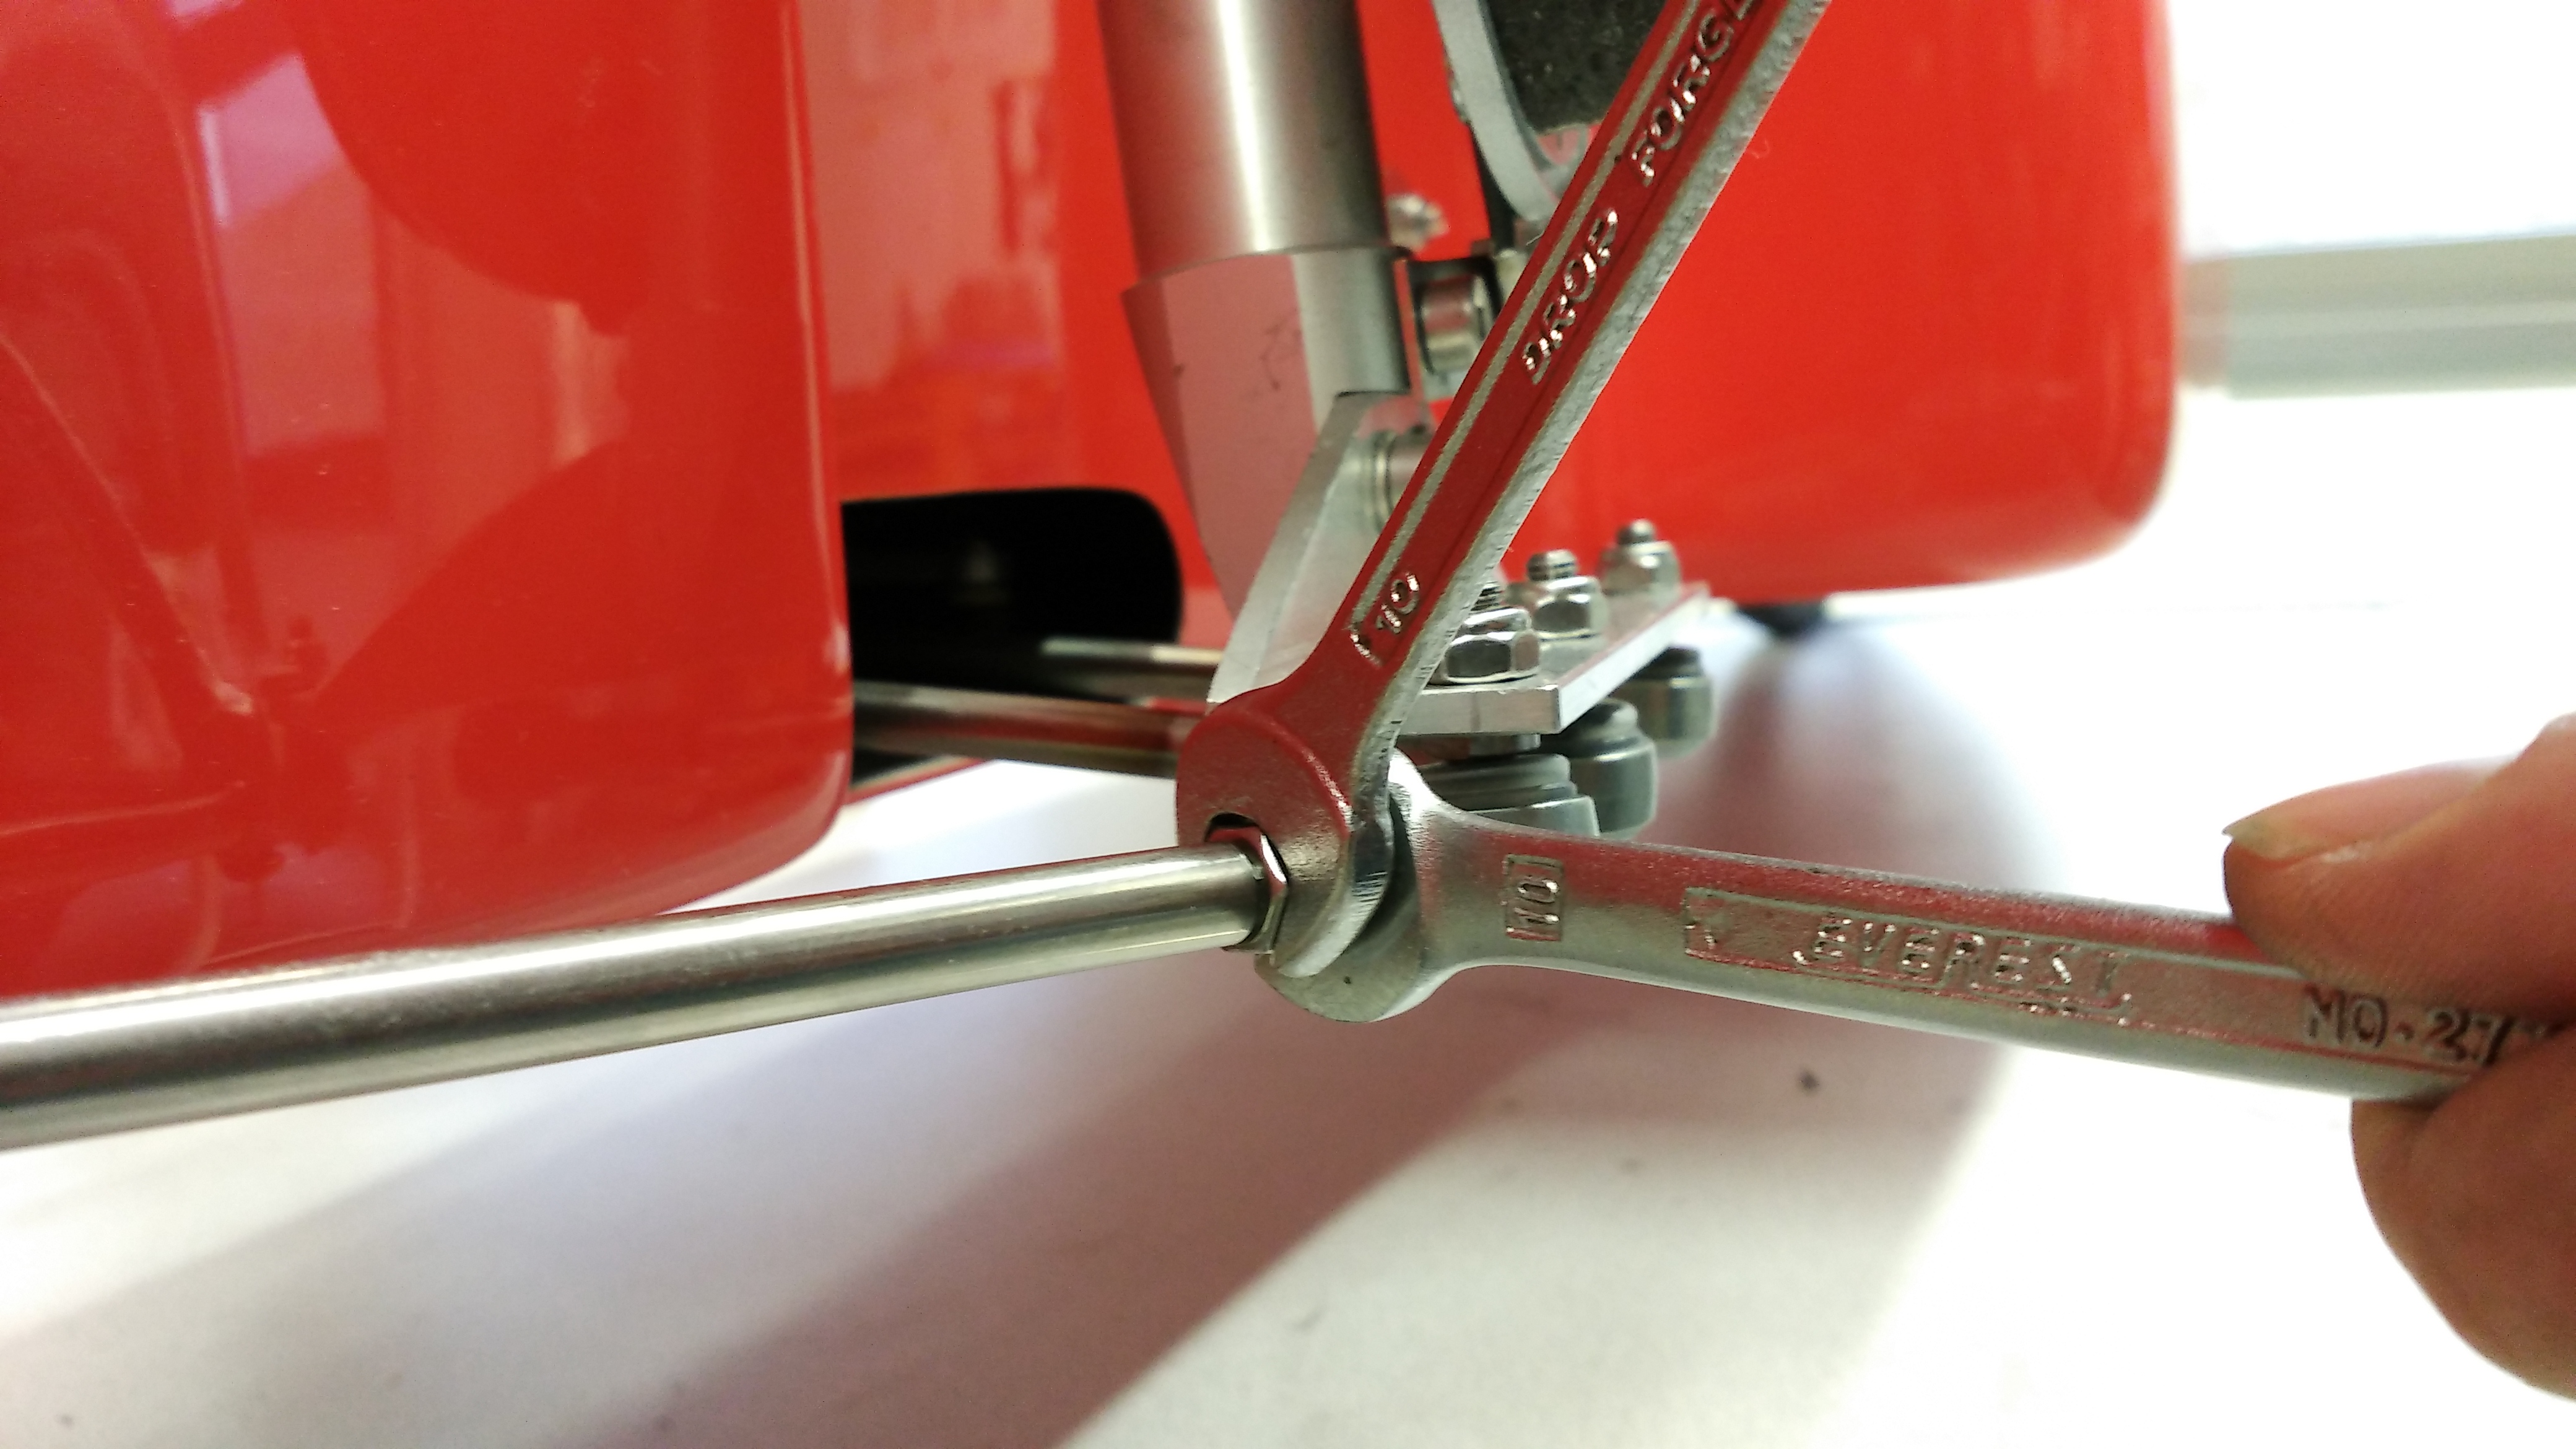
5. Now unblock the contra nut tightened against the rod end using two 10mm wrenches. Remove the arm form the rod end.

6. Replace it with the new strong arm, turn it as far as possible without using much strength. Do not tighten yet the contra nut.
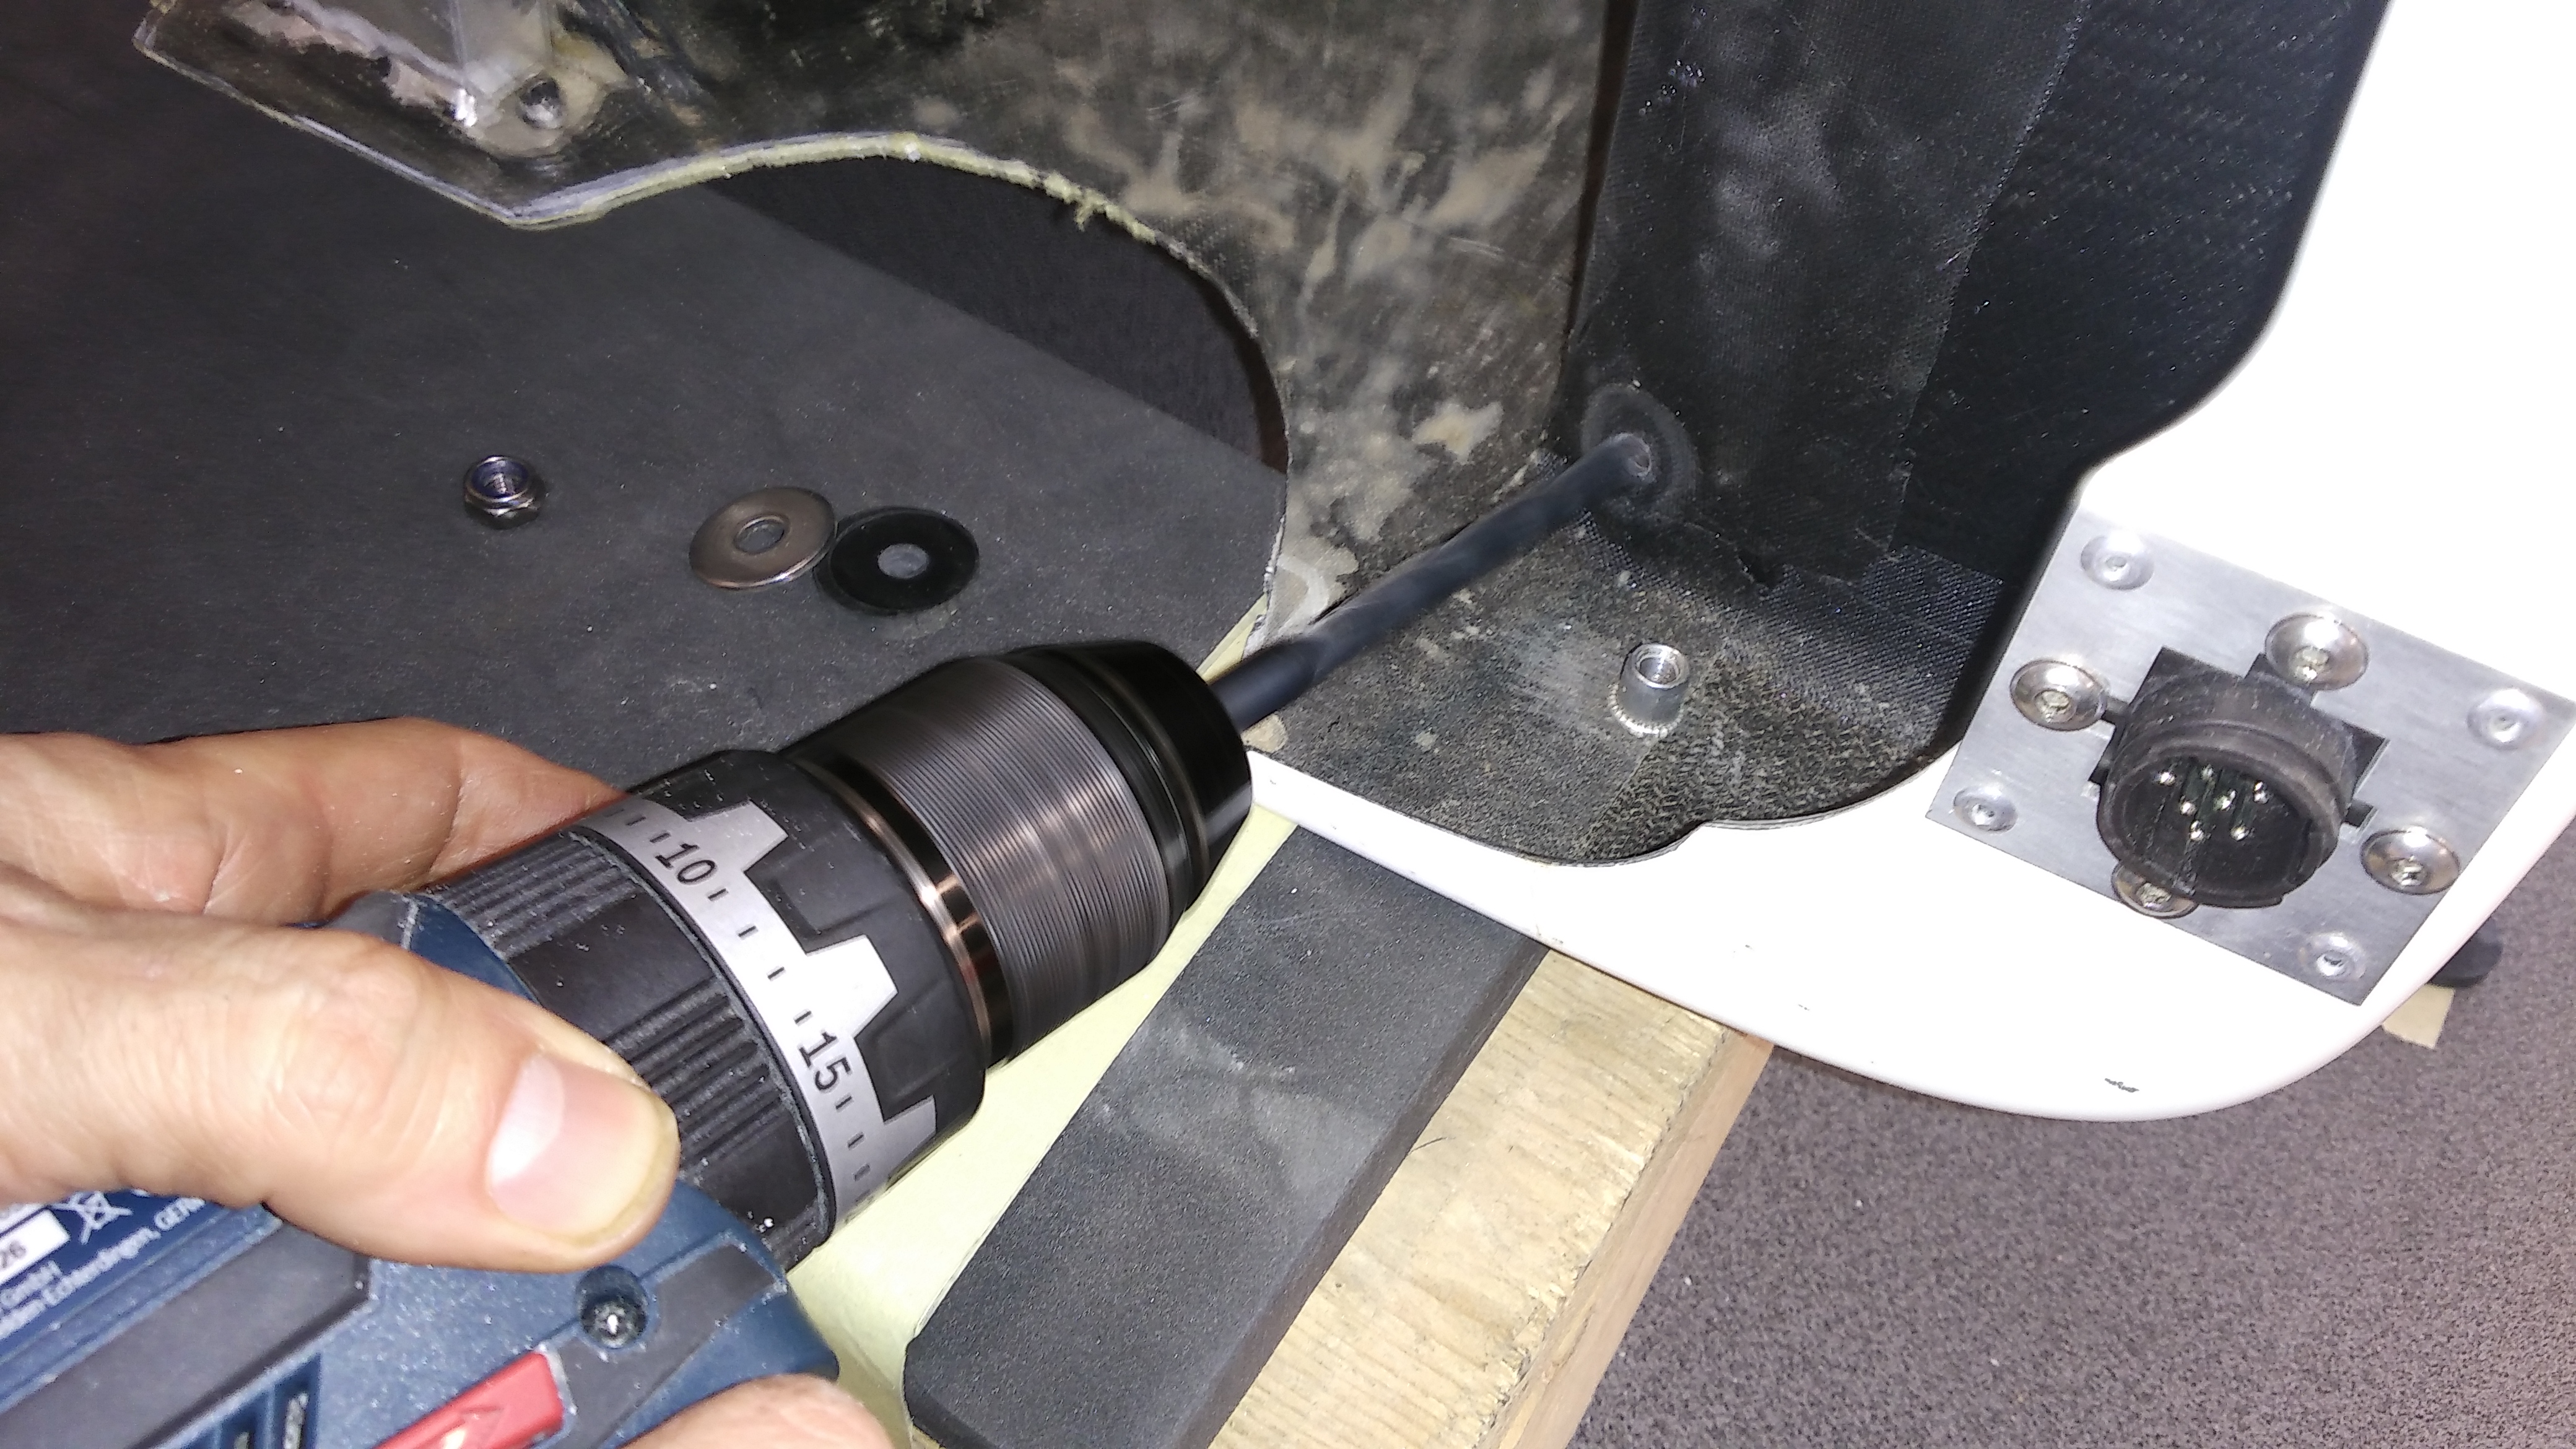
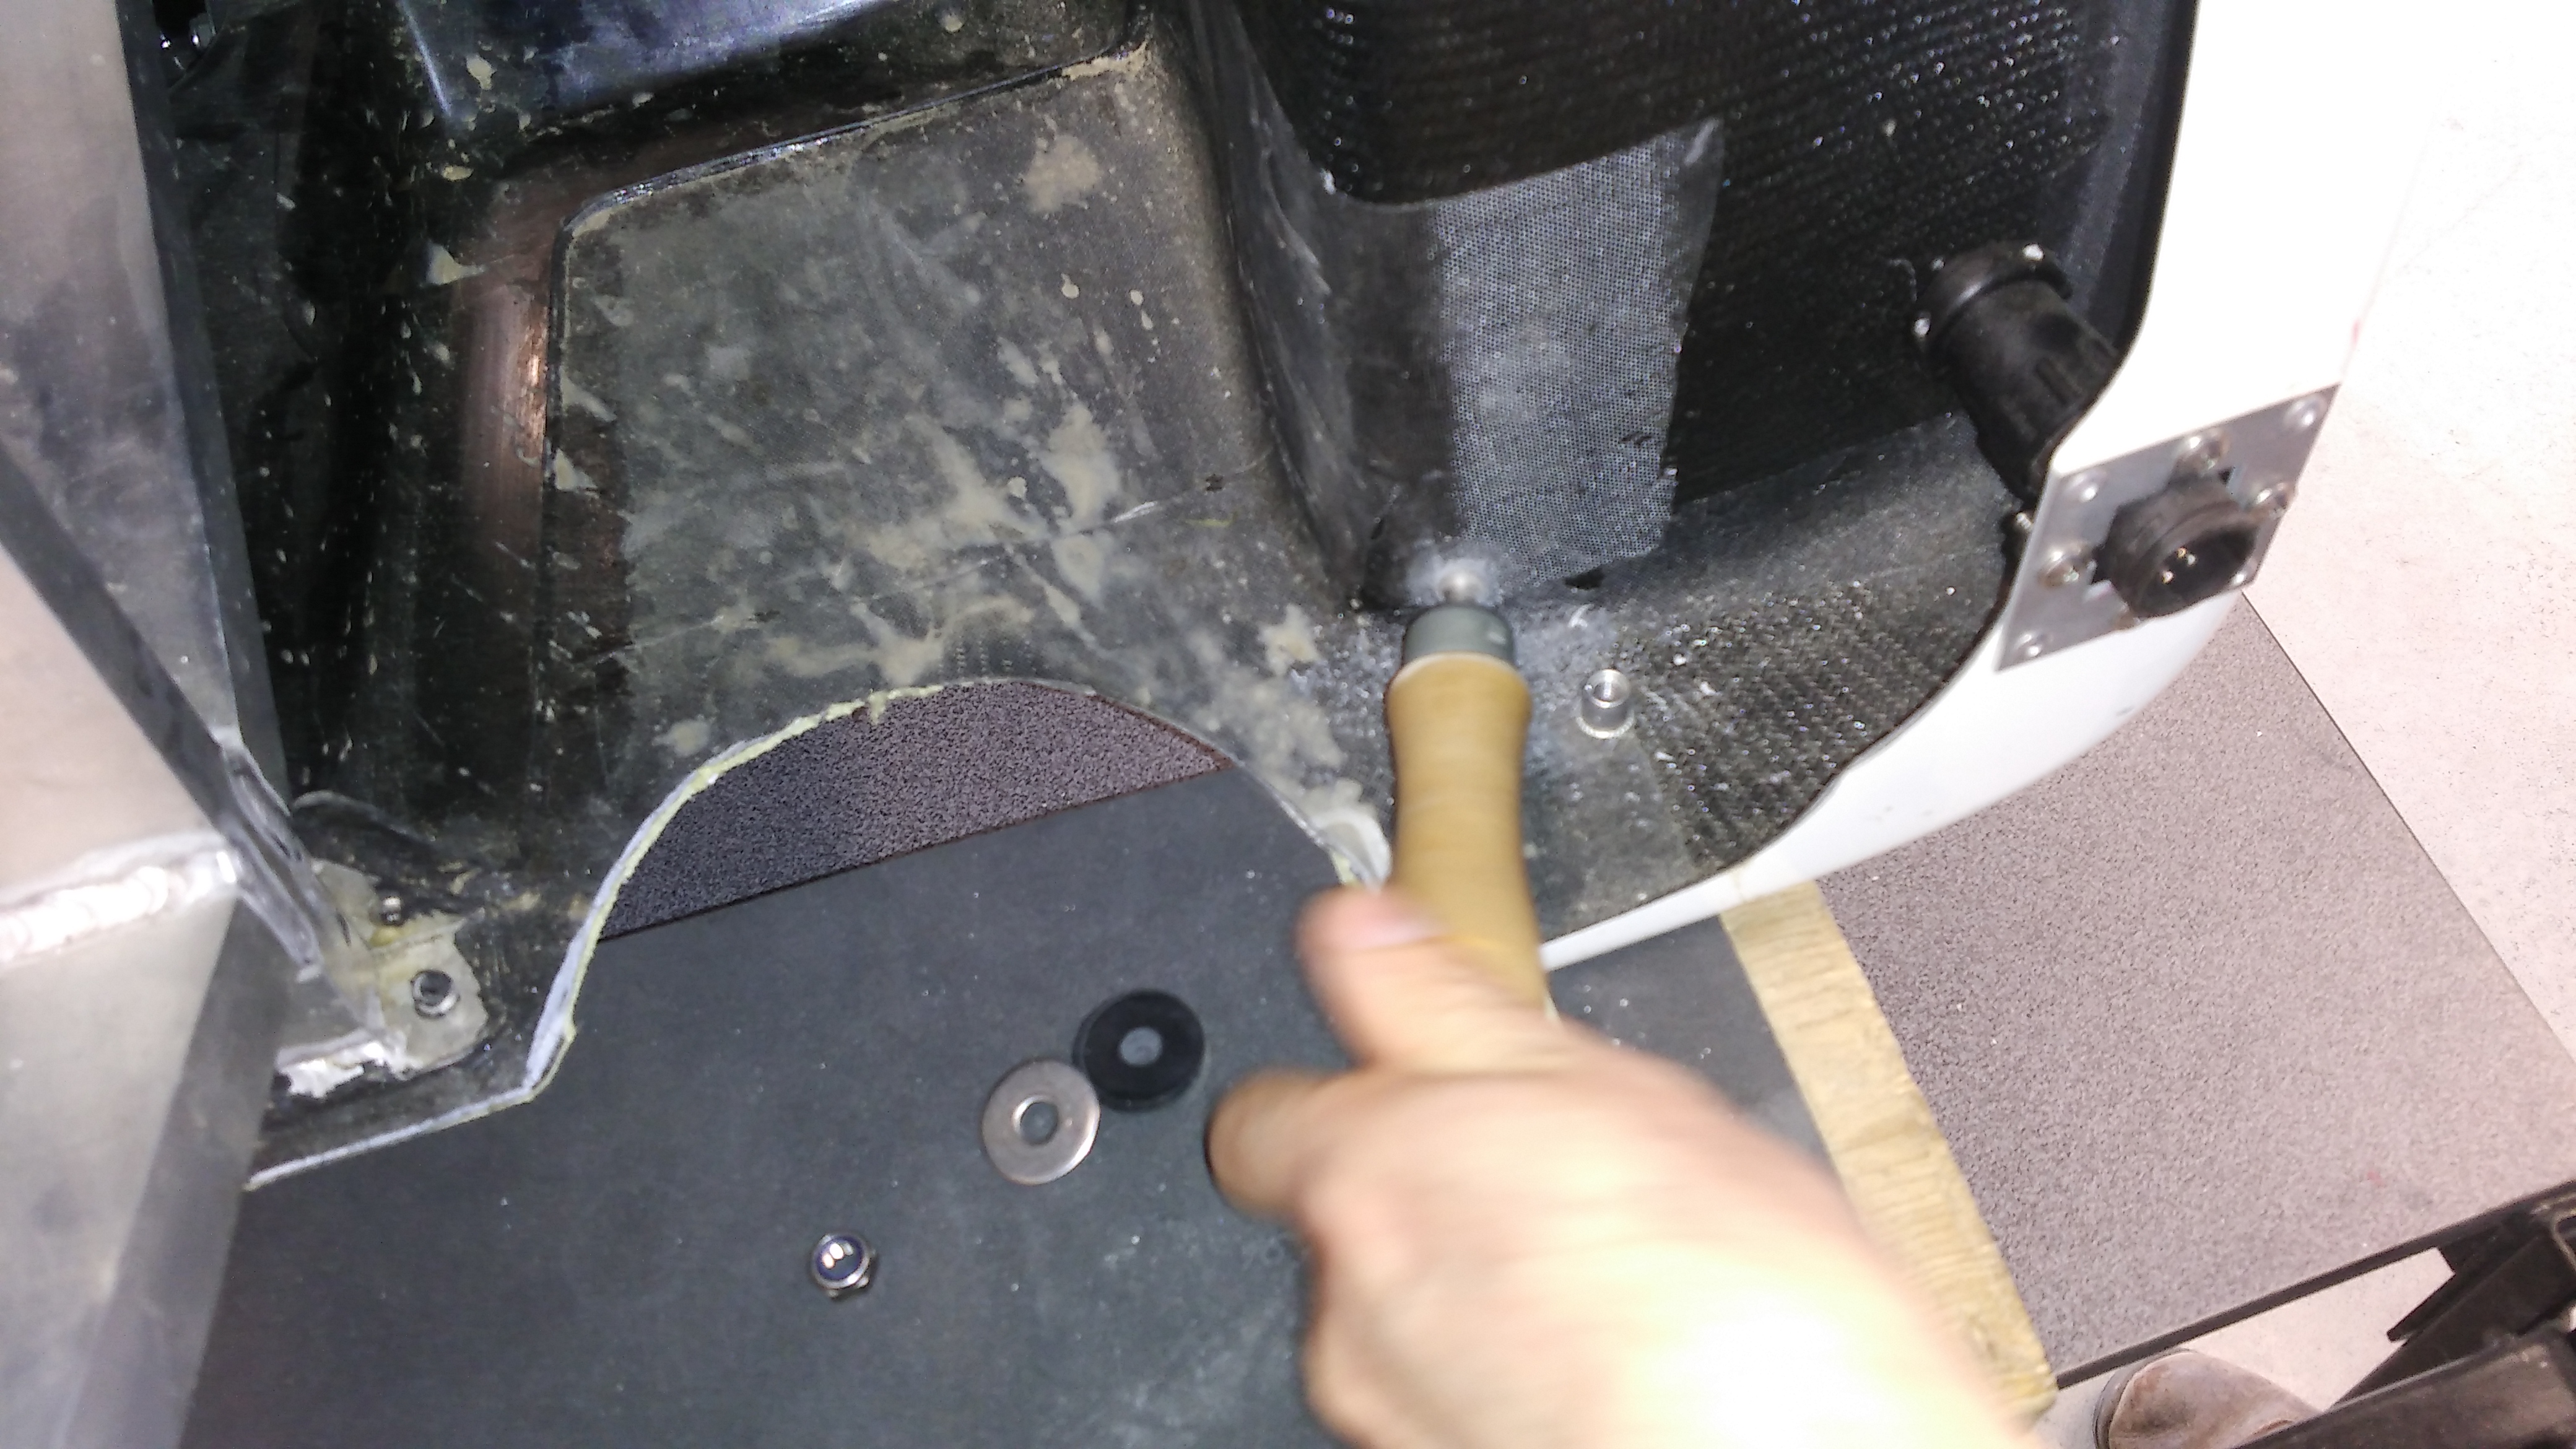
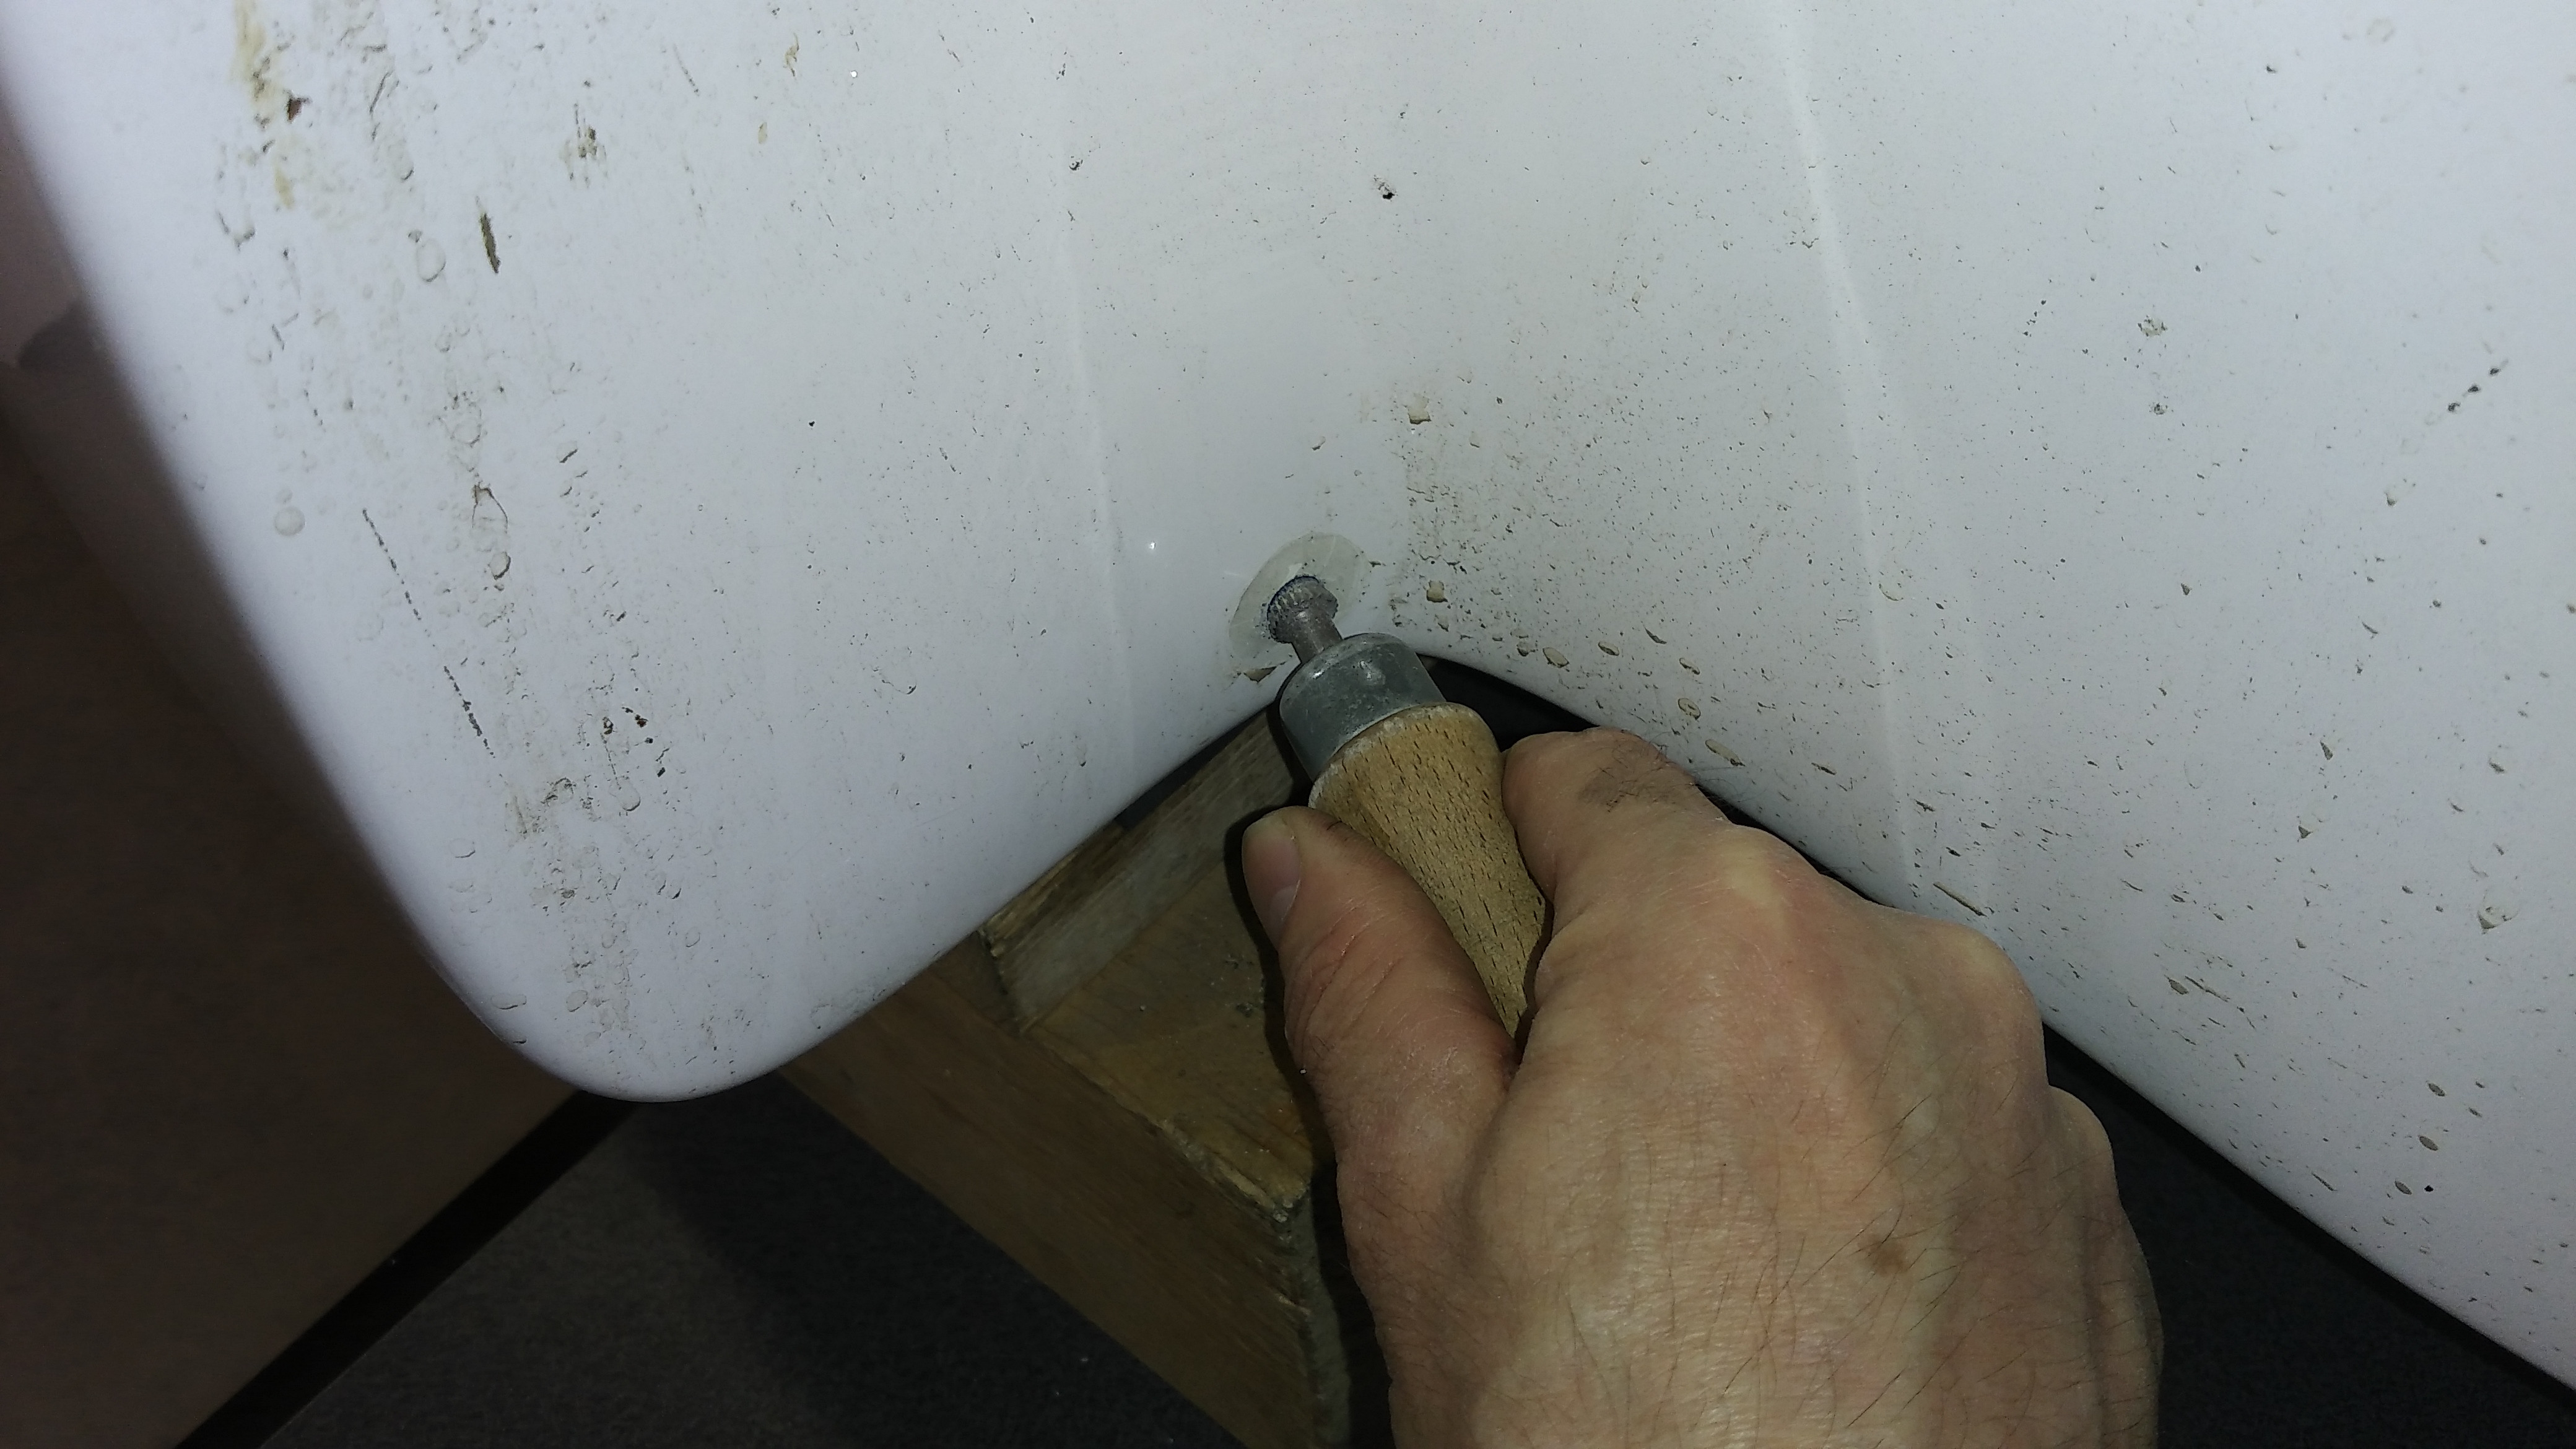
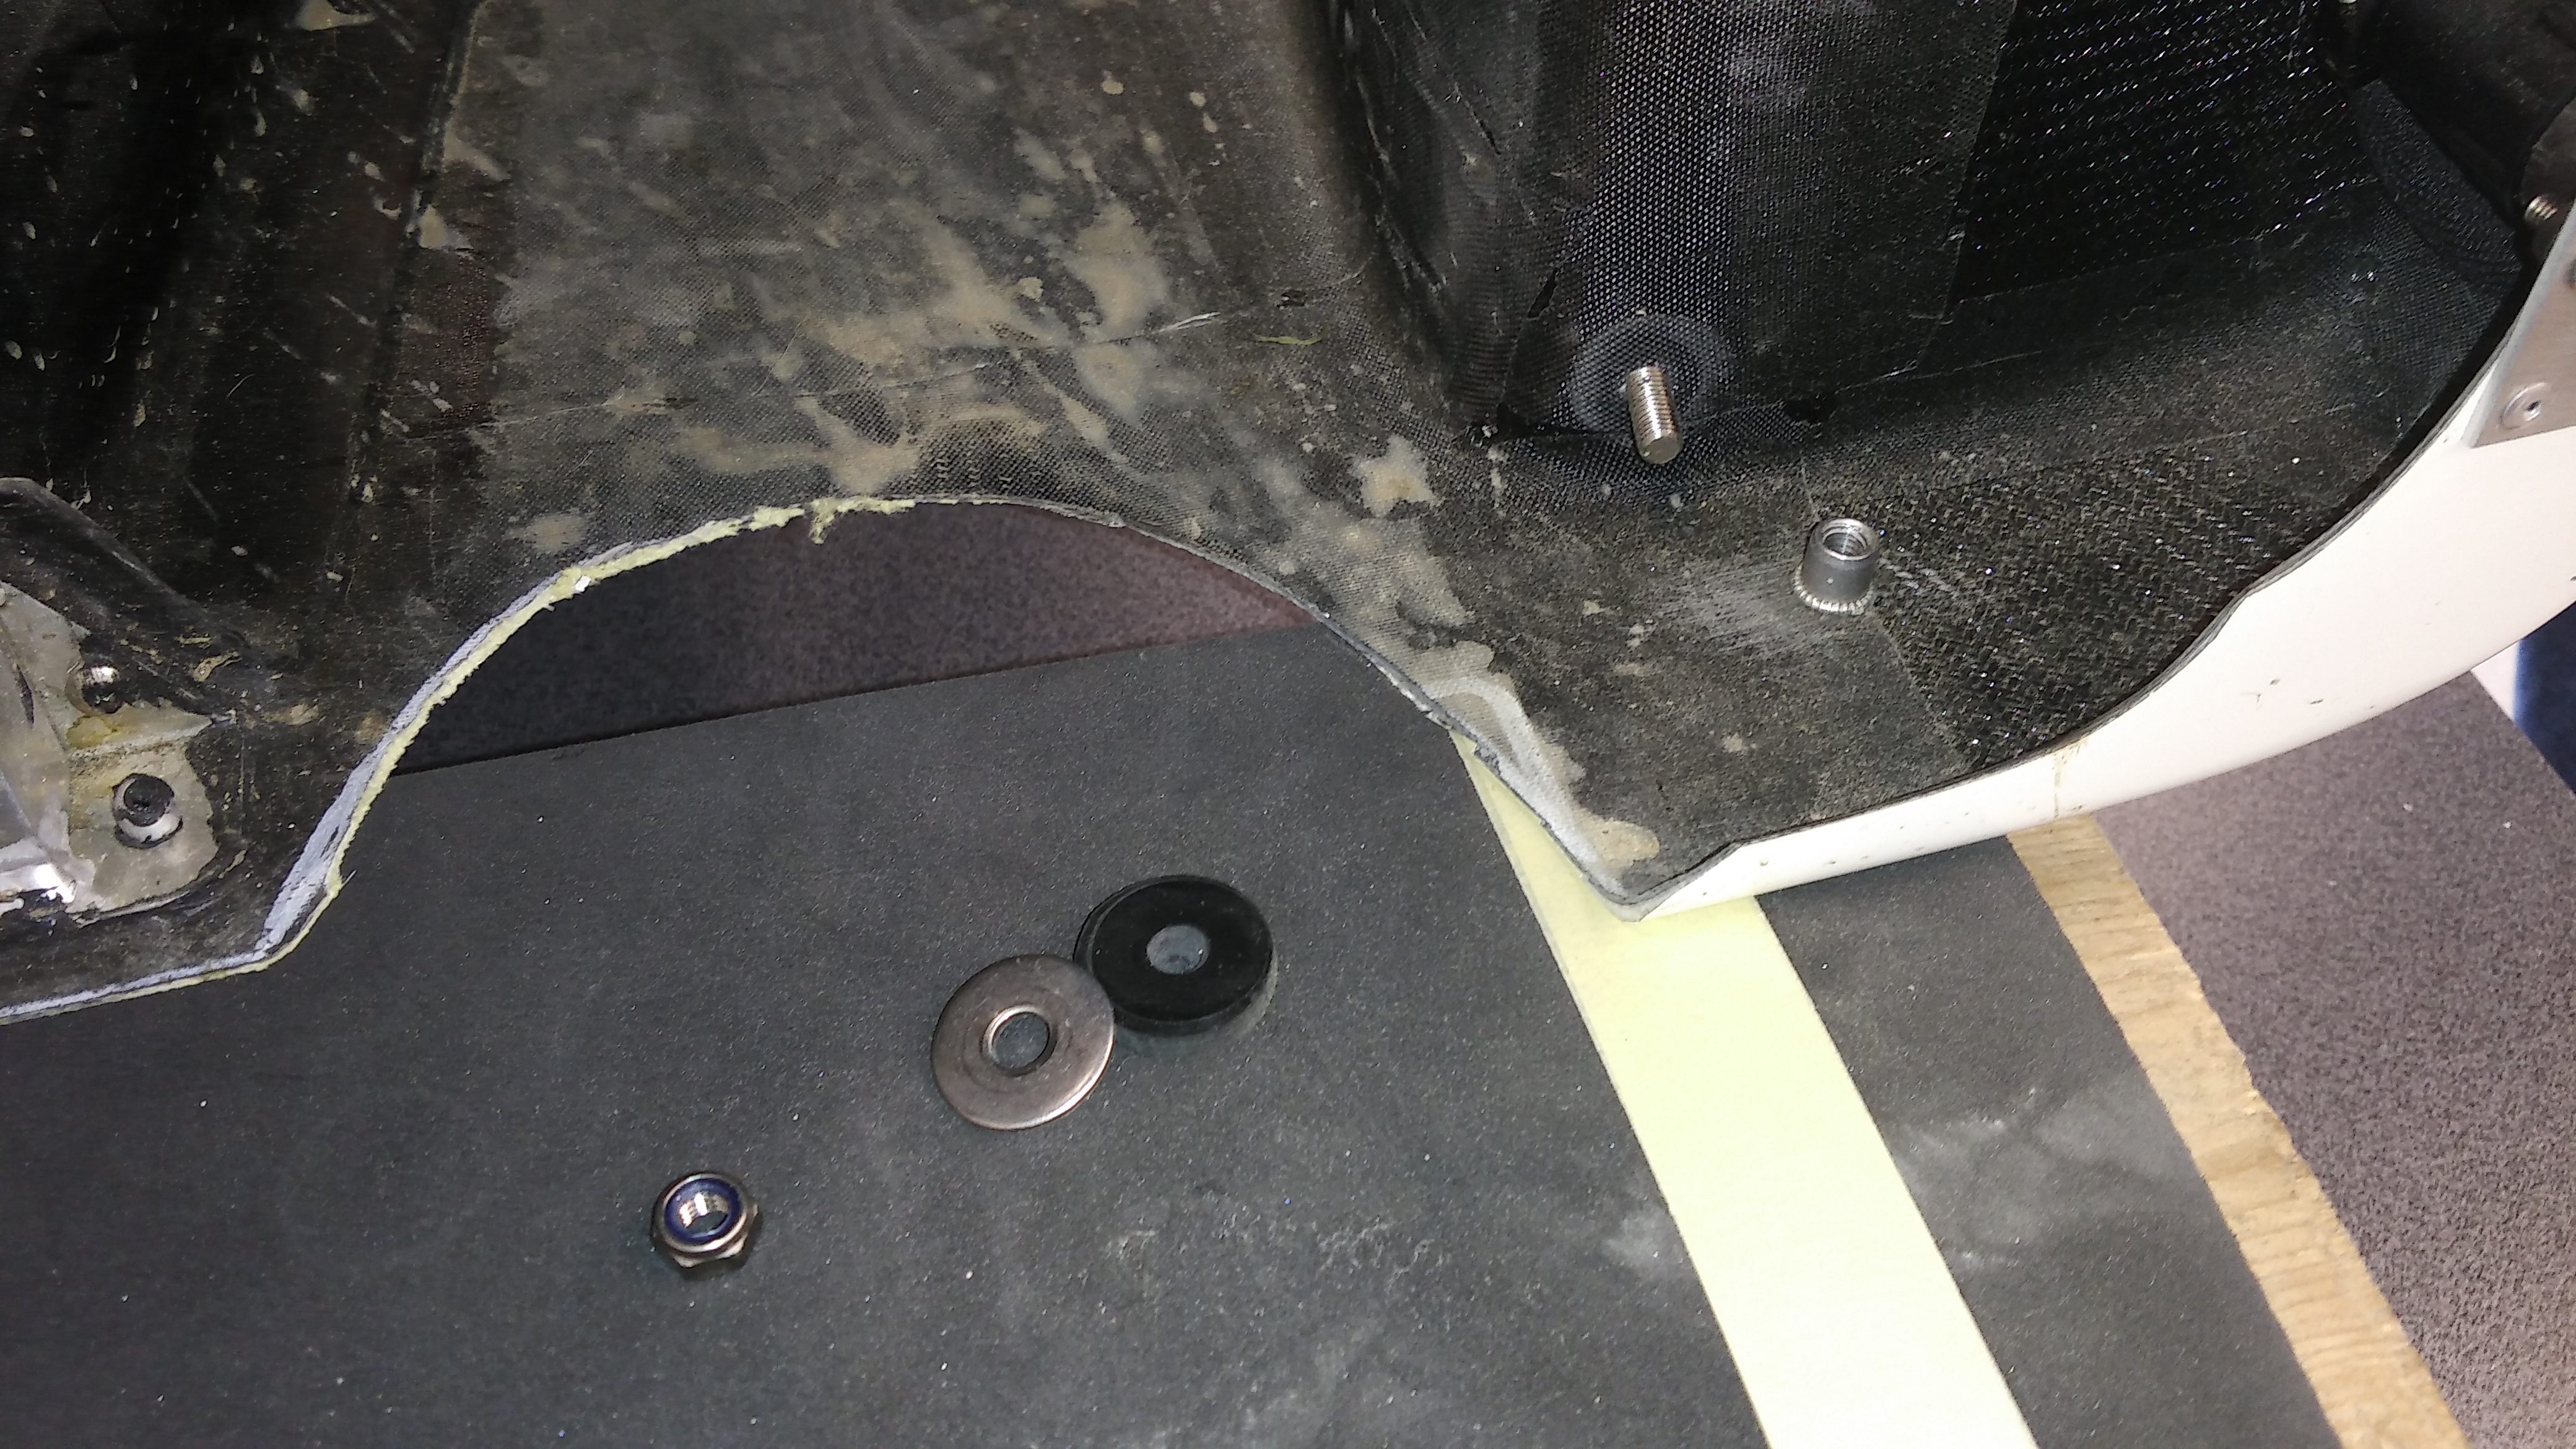
7. Drill the hole through the wheel well with a 8mm drill and grind away the edges.
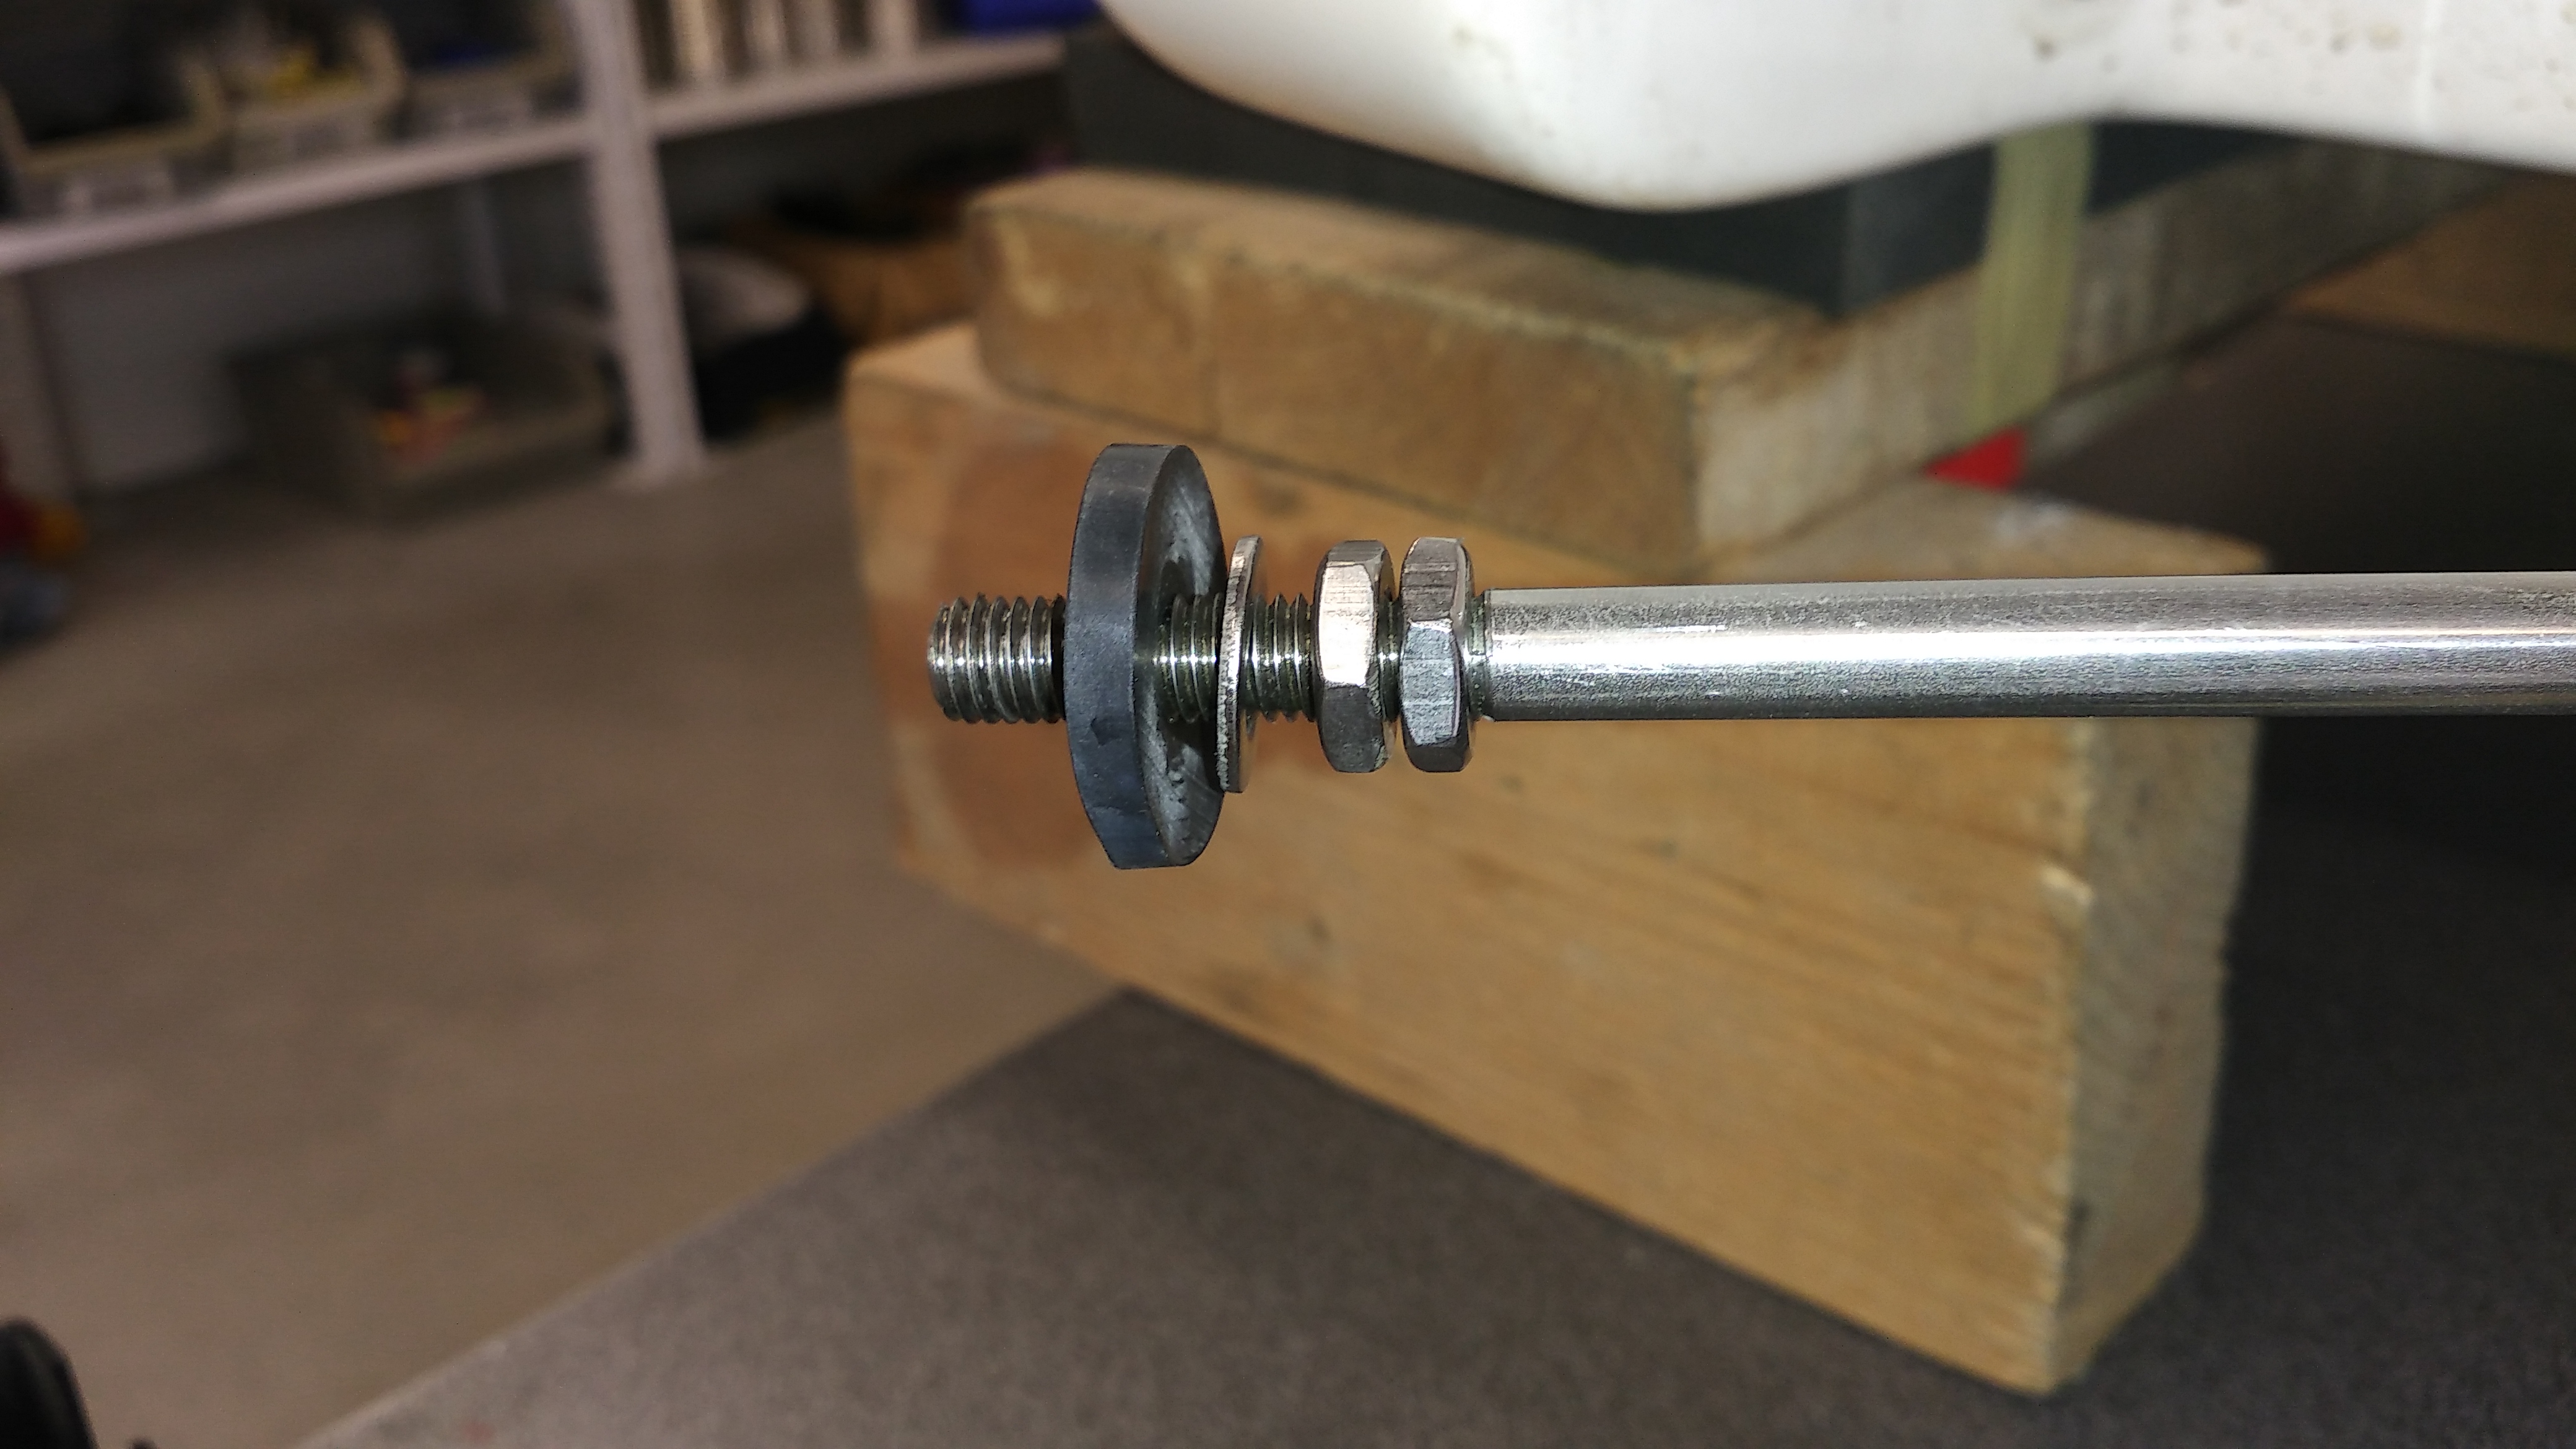
8. In case you have a WAW@2014 or even earlier version (base plate of front suspension 25 mm broad), the arm need to be longer and follow next instructions: Introduce the arm into the wheel well, after putting on it two 8mm nuts, one small steel washer, one rubber washer.


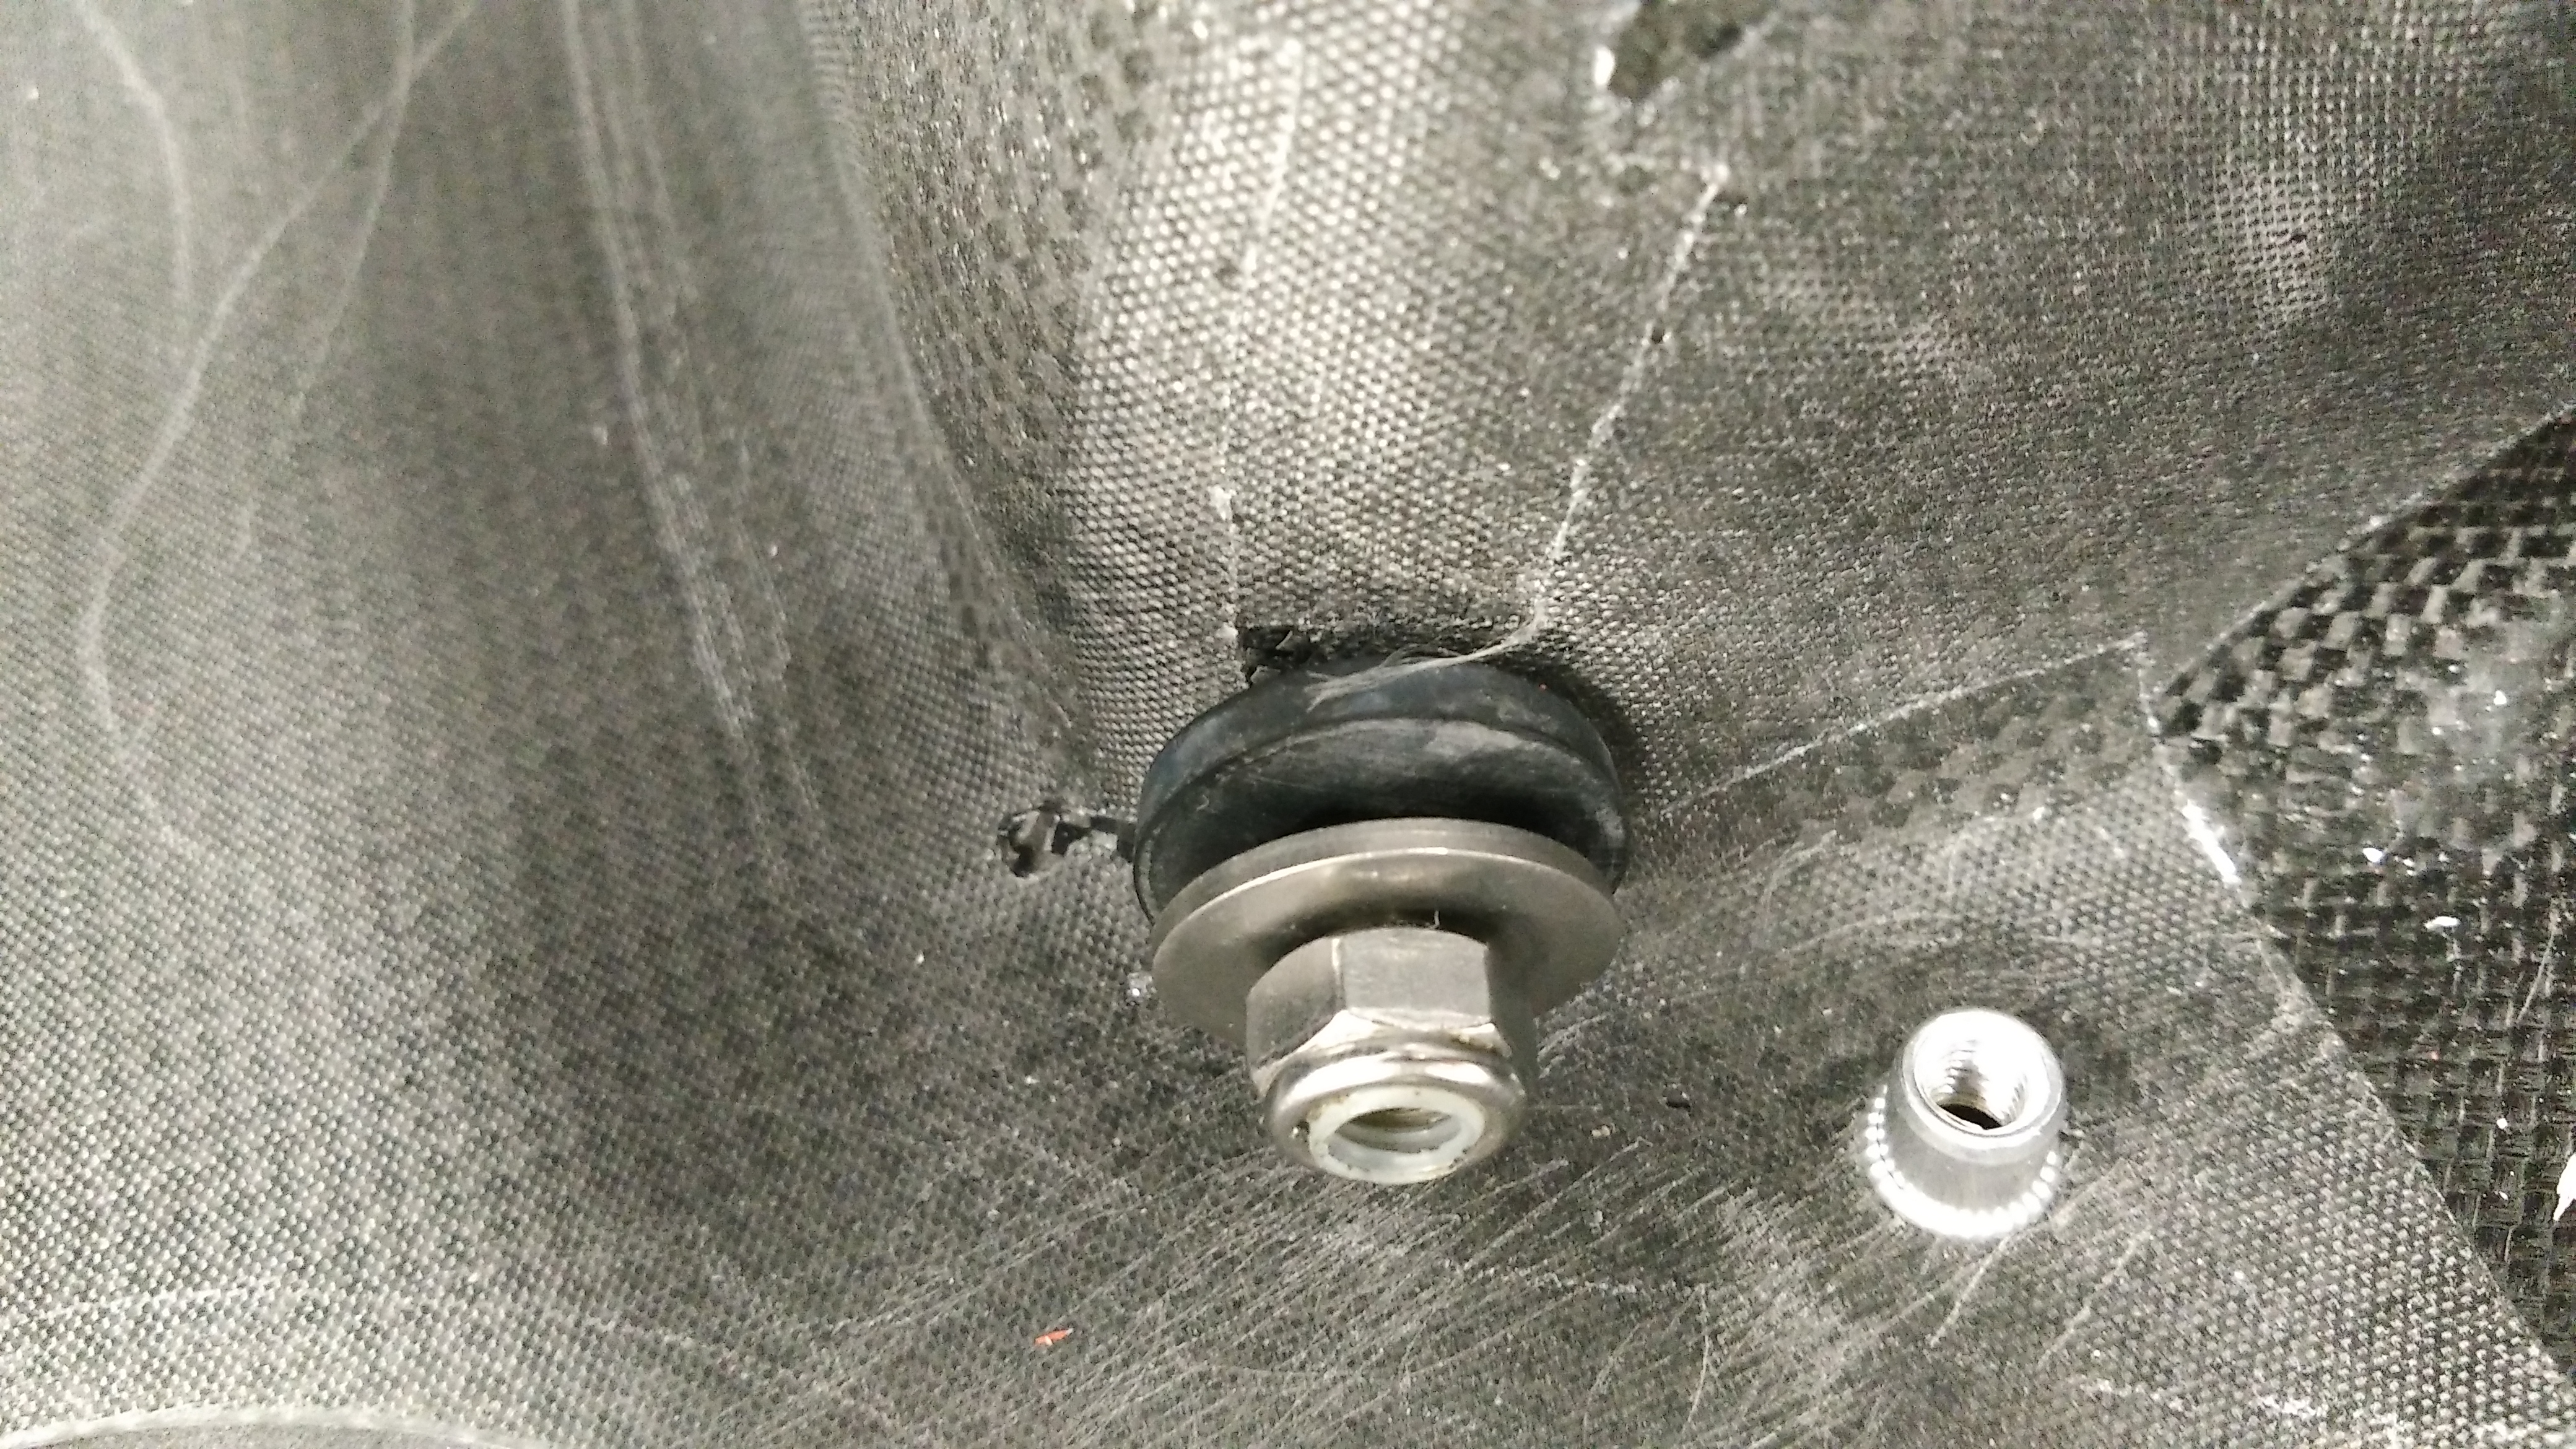
Block the contra nut against the rod end using two 10 mm wrenches. Put on the side sticking out inside the WAW one rubber washer, one big steel washer, one M8 self locking nut.


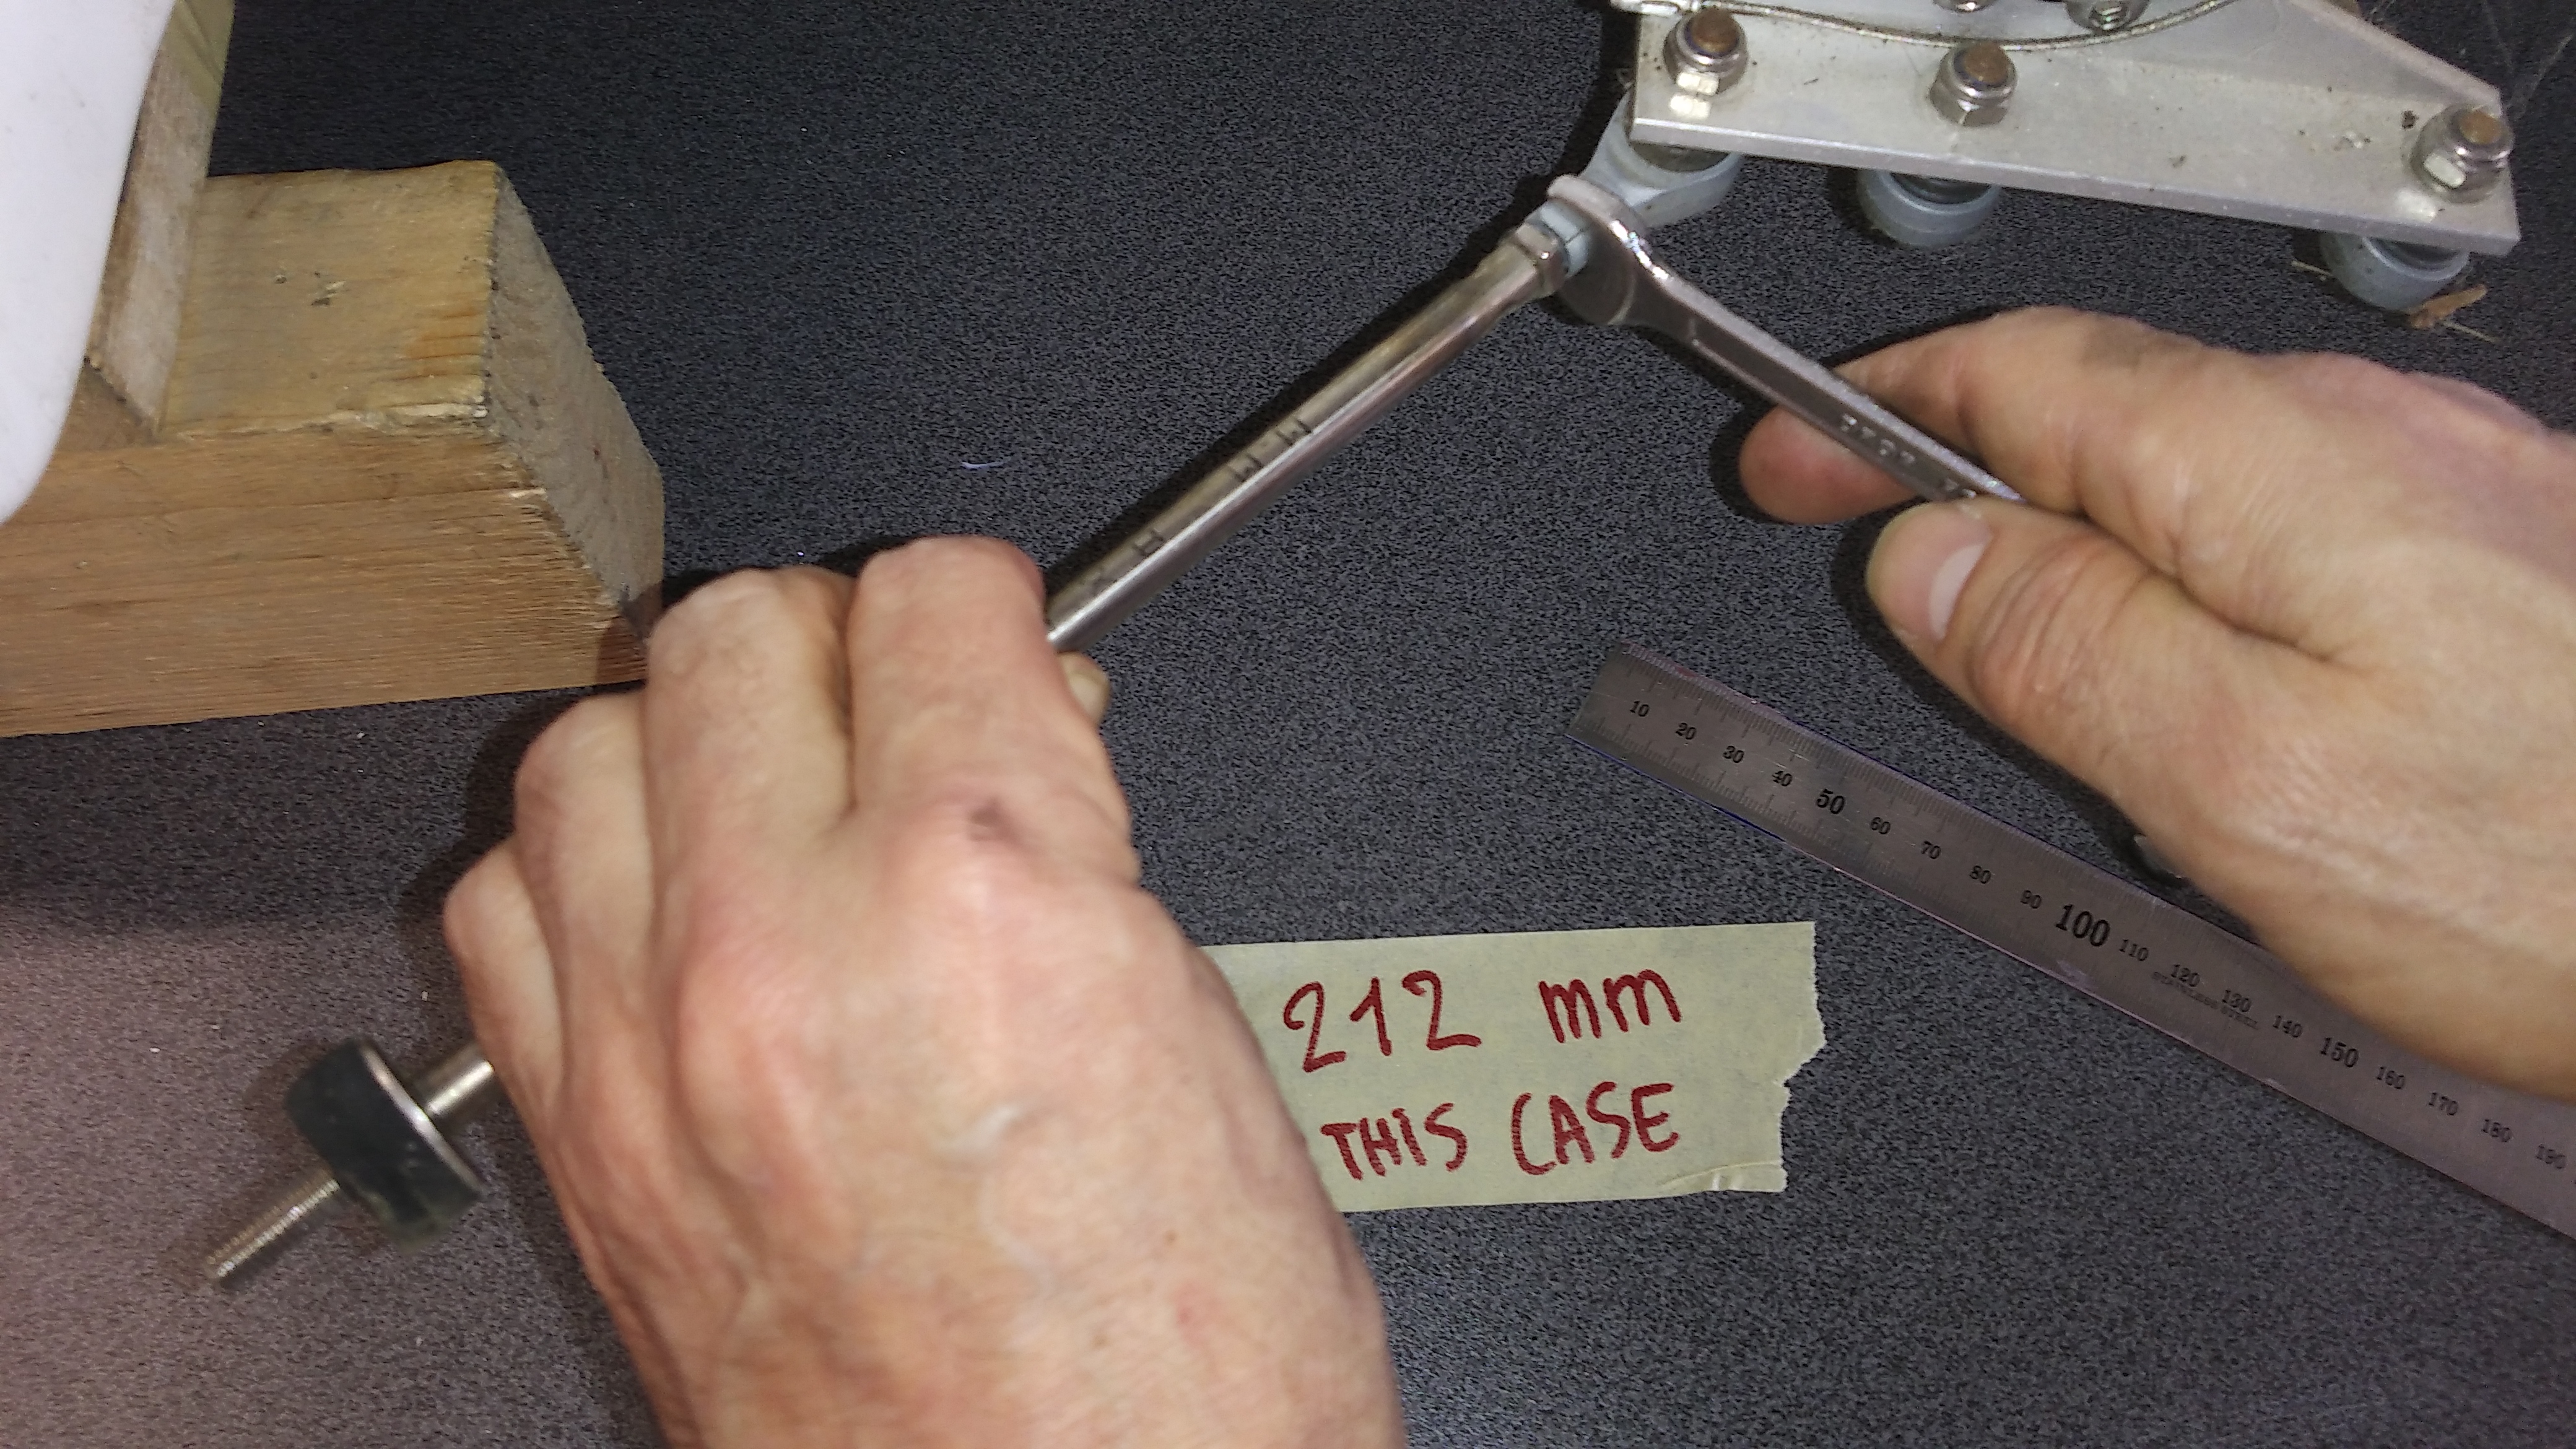
Tighten slowly this M8 nut while preventing the arm from turning by blocking the rod end at the other end. Measure at regular intervals the length of the arm and stop when you reach the desired distance. The rubber washers must only be very slightly compressed. If the distance is OK prevent the M8 nut from self-loosening by tightening the second M8 contra nut against it using two 13 mm wrenches.
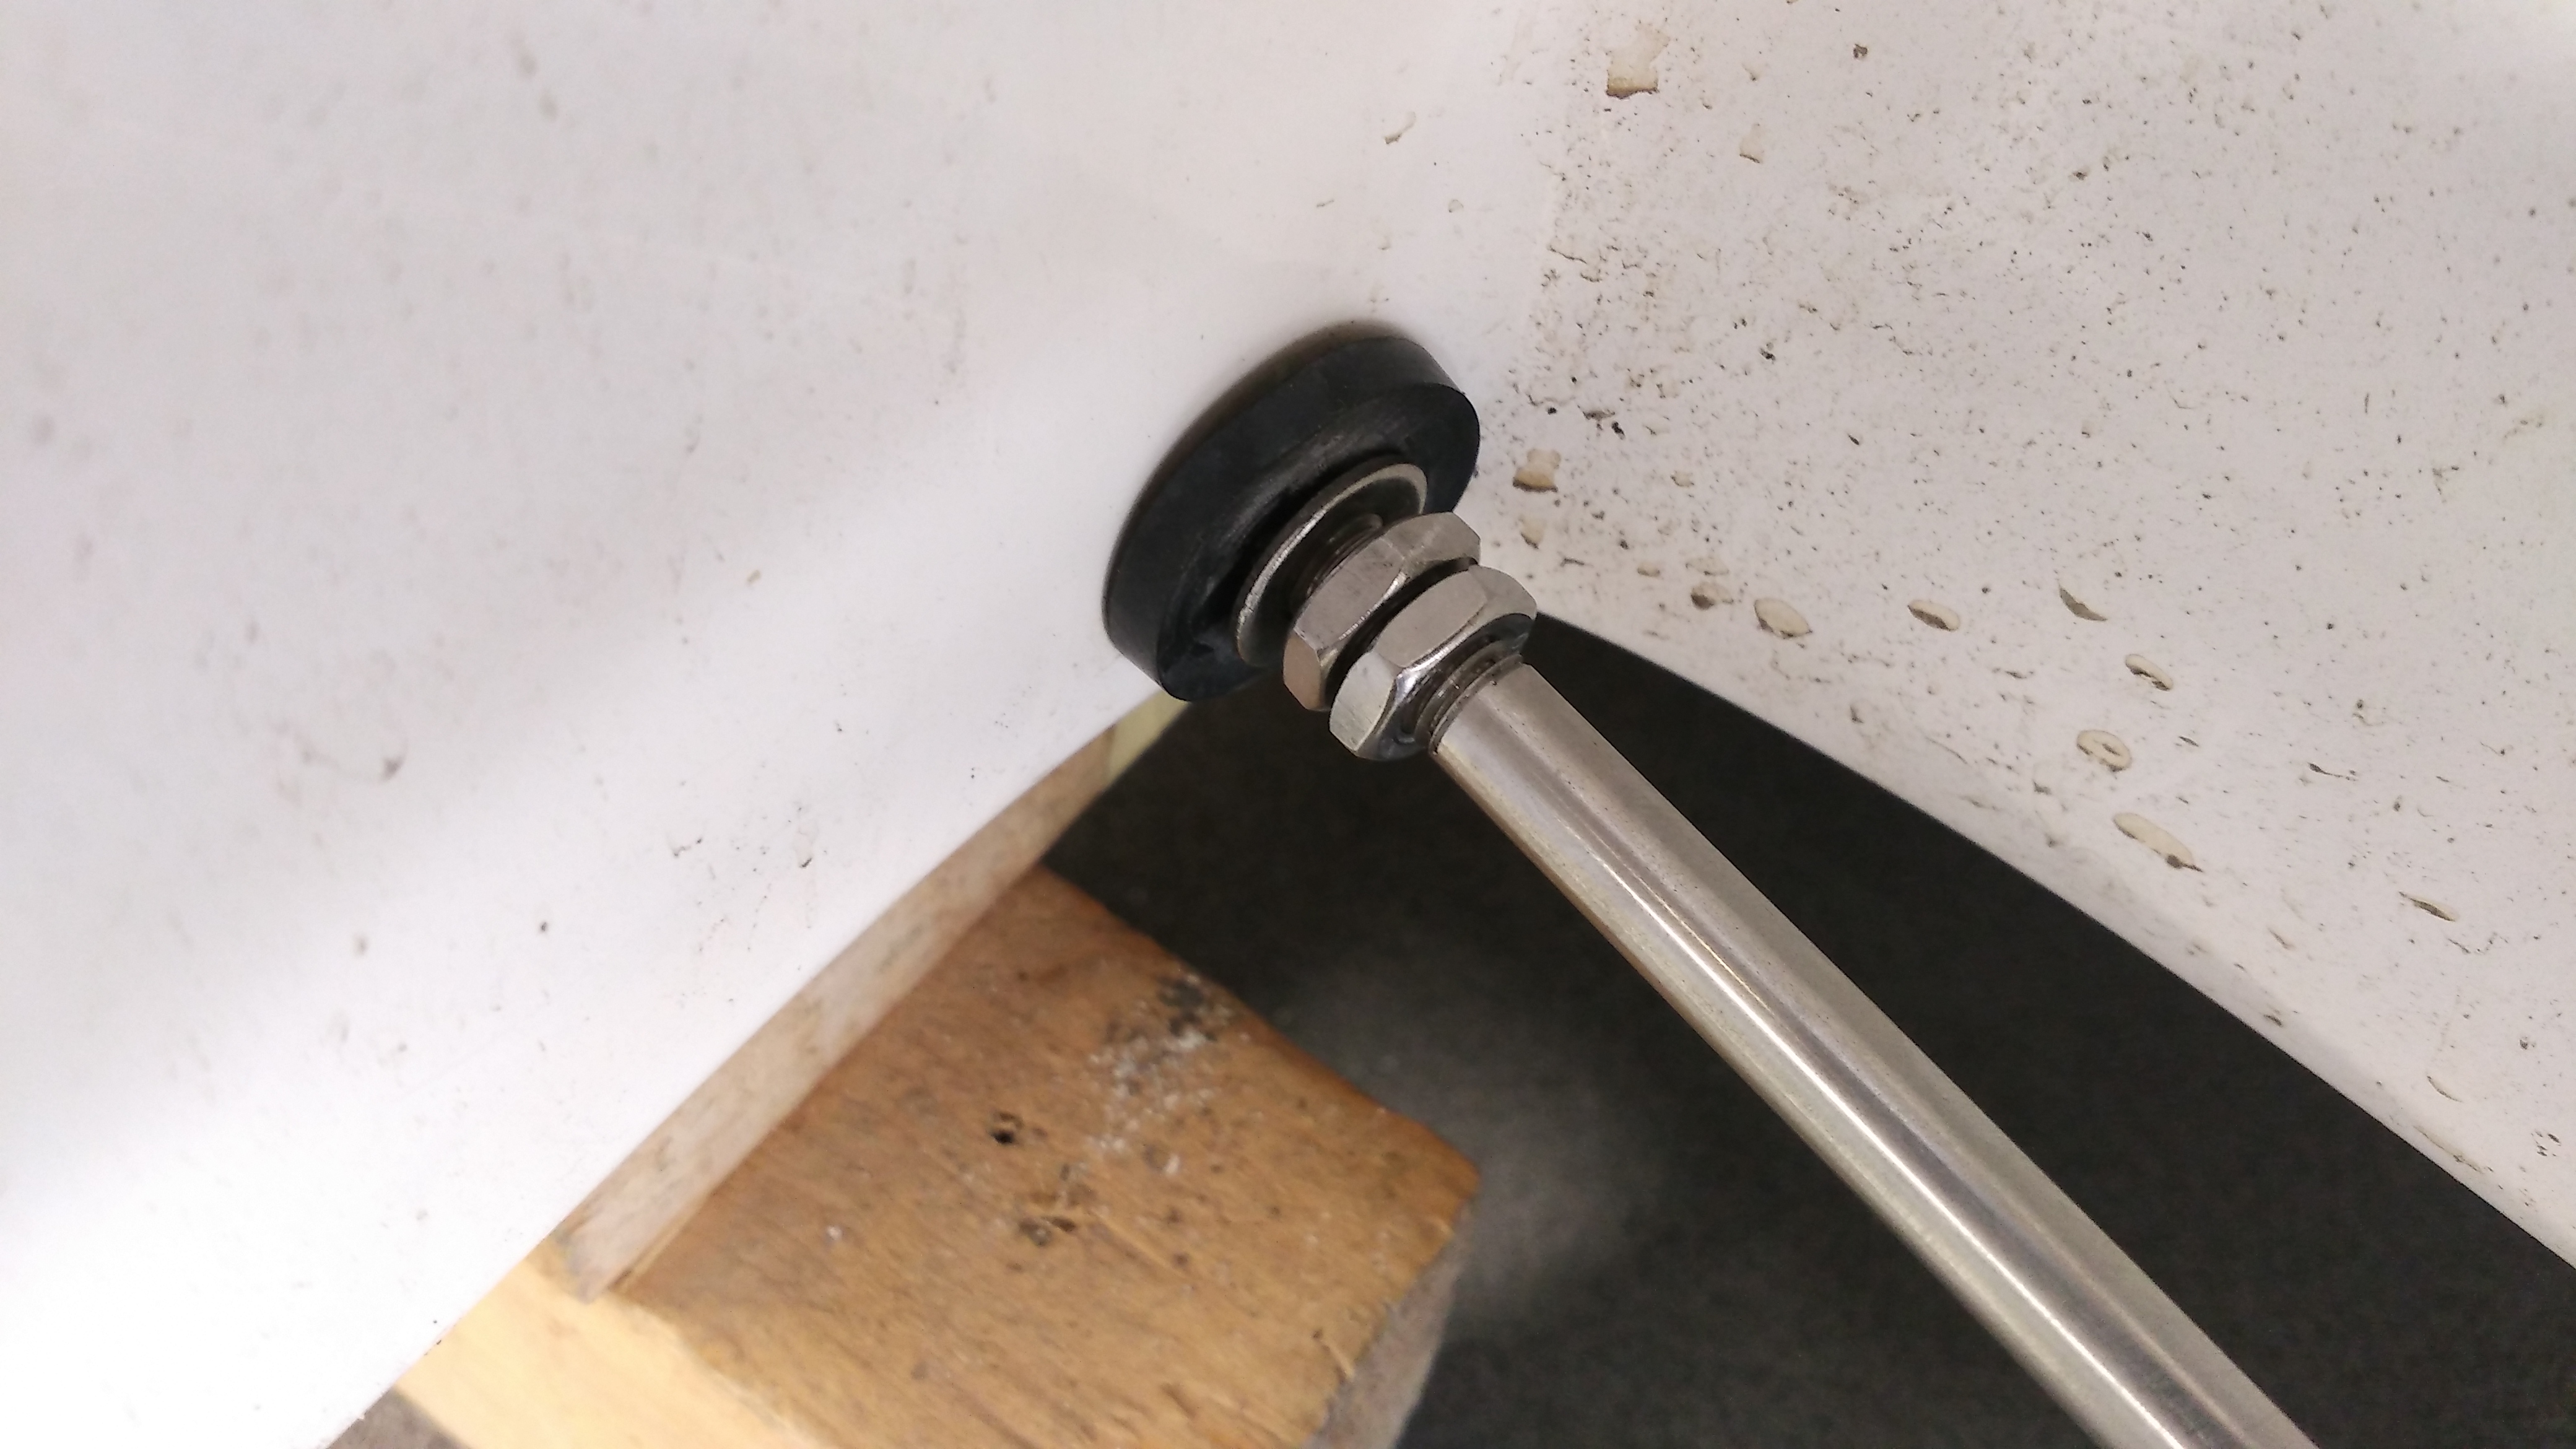
9. In case you have a WAW@2016 (base plate of front suspension 30 mm broad) the arm is used on minimal length and follow next instructions: Introduce the arm into the wheel well, after putting as far as possible on it one 8mm nut, one small steel washer and one rubber washer.

Put on the side sticking out at the other side of the wheel well one rubber washer, one big steel washer and one M8 self locking nut. Tighten this M8 nut while preventing the arm from turning by holding it tight at the other end. The rubber washers must only be very slightly compressed.

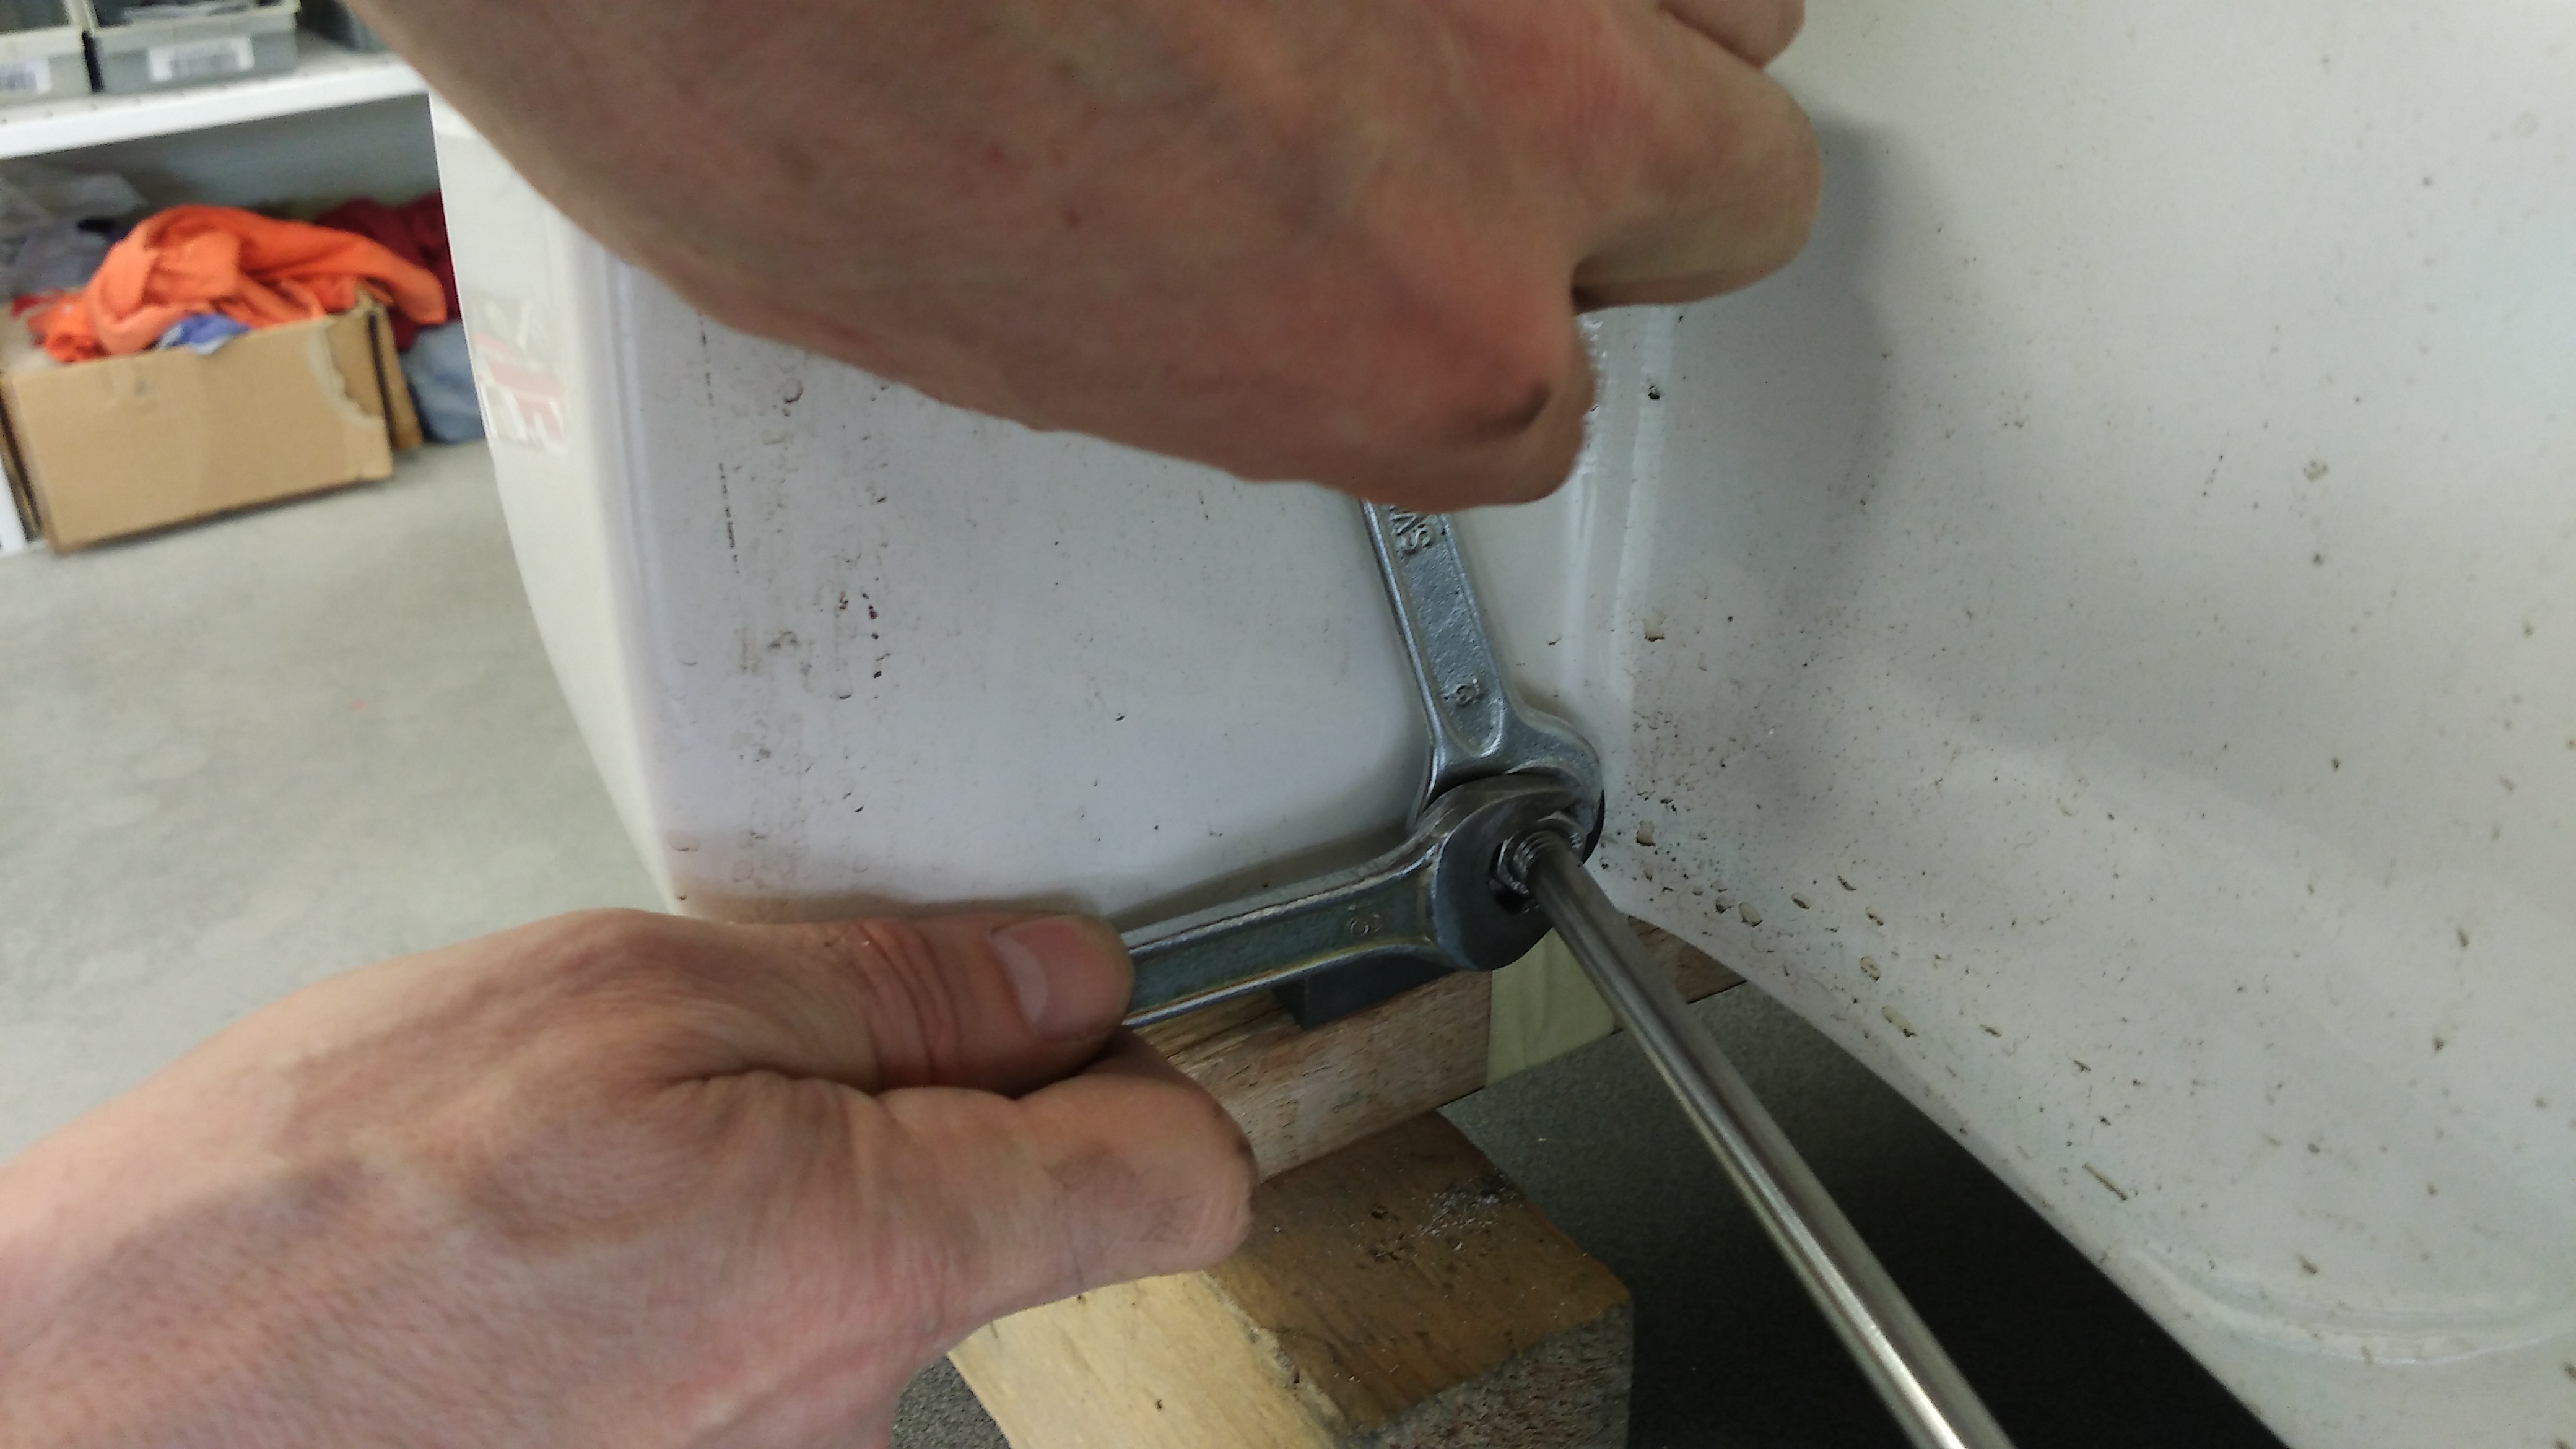
Now measure the length of the arm and by turning from the inside with the 13 mm wrench the arm into the rod end, shorten or lengthen it till the required distance. Block the contra nut against the rod end using two 10 mm wrenches.

10. Mount the wheel back, test if all screws are correctly tightened and if the wheel turns well. Put the wheel cover back and don`t forget to secure it at the spokes with cable ties. Done
3 Comments
-
Adam :: March 10, 2017 at 6:31 pm ::
-
Matthias Rauhut :: March 13, 2017 at 5:54 pm ::
-
Adam :: April 27, 2017 at 8:26 pm ::